Configuring Scheduling Resource Accounts
If your existing schedule program supports resource accounts for meeting rooms or other objects, part of migration will involve moving these accounts and getting them correctly configured in Microsoft Exchange Server. Although some migration tools move resource accounts and their calendar data, you may still need to do some additional configuration to turn them into a calendar resource.
After you migrate the resource accounts, someone with Mailbox permissions must open each Microsoft Outlook calendar and configure the calendar properties.
If you are switching from Microsoft Mail for PC Networks, specify the administrator's Windows NT account in the Assoc-NT-Account field of the user list file. If you are migrating from other systems, specify the administrator's Windows NT account in the Assoc-NT-Account field of the migration file.
For the following procedures, if you do not have permissions on the mailbox, use the Administrator program to assign yourself Mailbox permissions.
Note If you're using the 16-bit version of Microsoft Outlook, calendar data is automatically imported to Microsoft Exchange Server. If you're using the 32-bit version of Microsoft Outlook, you must manually import calendar data to Microsoft Exchange Server.
 To configure a mailbox as a resource for 16-bit Microsoft Outlook
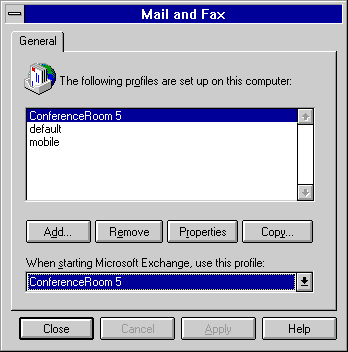
- In Control Panel, choose the Mail and Fax icon to create a new profile. Specify the server and mailbox, and select this profile as the default.
- In Microsoft Outlook Calendar, choose Set Access Permissions from the Tools menu, and select the Users tab.
- Choose Add, and select the user or distribution list name, and then choose OK.
- For each user and distribution list selected, select the name in the Users box. In the User Role box, select a role for the user.
At least one name should be assigned the Delegate or Delegate Owner role.
Tip Use distribution lists for Delegate or Delegate Owner roles if one person is responsible for more than one resource. If that person changes positions in the company, you can remove them from the distribution list and add their replacement instead of modifying roles for each of their resources.
- (Optional) Select the Global tab, select one or both options, and then
choose OK.
| Option
| Description
|
|
Disallow Overlapping Appointments |
Prevents scheduling overlapping appointments. |
|
Disallow Recurring Appointments |
Prevents scheduling recurring appointments. |
- From the Tools menu, choose Options, select the General tab, and select from the list of options.
| Option
| Description
|
|
This account is for a resource |
Designates this account as a resource. |
Automatically accept
meeting requests |
Allows the organizer of a meeting to schedule this resource. |
Automatically remove
canceled meeting |
Allows the organizer of a meeting to remove a canceled meeting from this schedule. |
- Choose OK.
- From the File menu, choose Exit and Log Off.
- In Control Panel, choose the Mail and Fax icon to remove the profile, and select the original profile as the default.
To configure a mailbox as a resource for 32-bit Microsoft Outlook
- In Control Panel, choose the Mail and Fax icon to create a new profile. Specify the server and mailbox, and select this profile as the default.
- Create an email account with the name of the resource. For example, create an email account with the name Conference Room 3/422.
- Create an email account for the delegate. You can create a dedicated delegate account, or you can use an existing user account. For example, you may use a receptionist's email account for booking all conference rooms in a building.
- Log on to the resource account in Microsoft Outlook.
- On the Tools menu, choose Options, and then choose the Delegates tab.
- Choose Add.
- In the Add Users dialog box, select the delegate user, choose Add, and then choose OK.
- Set the permissions you want the delegate to have, then choose OK.
- On the Delegates tab, select the Send meeting requests and responses only to my delegates, not to me check box.
- Log on to the delegate account in Microsoft Outlook.
- On the Tools menu, choose Options, then choose the Email tab.
- Select the Process requests and responses on arrival check box.
- Choose the Calendar tab, and then choose Advanced Scheduling.
- Under Processing of meeting requests, select the check boxes that correspond to the options you want to use.
Select all three options for complete automatic booking of all meeting requests forwarded to the delegate. If you select only some of these options, you must log on to the delegate account periodically to accept or reject meeting requests.
- From the File menu, choose Exit and Log Off.
- In Control Panel, choose the Mail and Fax icon to remove the profile, and select the original profile as the default.