 To create the user list from a Microsoft Mail (PC) postoffice
| Migration | << | >> |
|---|
You should use this procedure if you need to make changes to the common name of the mailboxes, configure the associated Windows NT account, or import directory data as part of creating mailboxes.
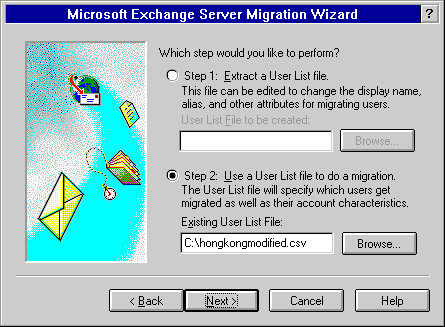
The user list is created from existing Microsoft Mail mailboxes. Before creating mailboxes, the user list can be modified to meet your naming convention, site or Windows NT security account needs.
 To create the user list from a Microsoft Mail (PC) postoffice
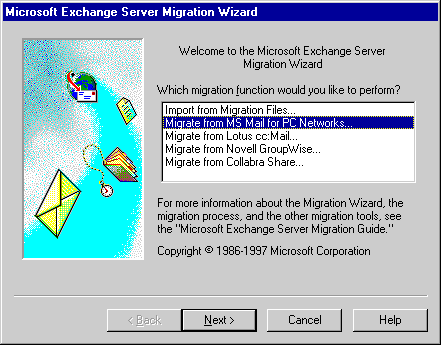
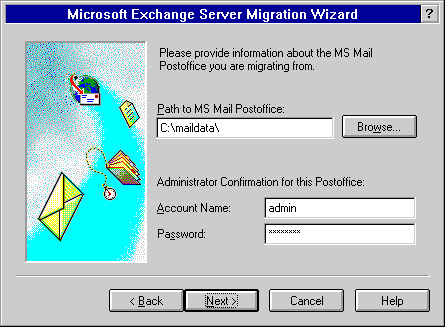

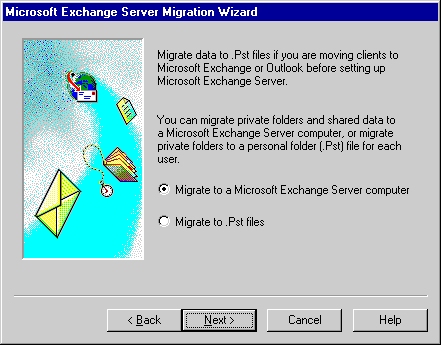

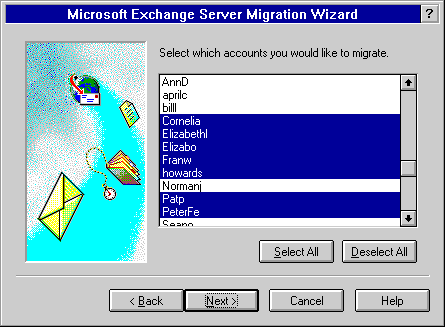
You can make changes as needed in the user list file. If you need to change the common name of a mailbox, do it before the mailbox is created. Other fields can be modified now in the text file or later. To change them now, use the following procedure. To change them later, use the Administrator program to change them one at a time, or use the Directory Import command to change them in a batch mode.
 To modify the user list file
This is a comma-separated text file. The first row contains field names.

The following fields are in the user list. The first two can't be changed, and the first five need to be kept in the same order:
| Field | Contents |
|---|---|
| SFS_UserName | The mailbox name or alias of this mailbox in the postoffice. Do not change this field. |
| SFS_FullName | The full or display name of this mailbox in the postoffice. Do not change this field. |
| MigrateUser |
This field should be Y if the mailbox is to be migrated and N if the mailbox should not be migrated. |
| Obj-Class |
This field should be mailbox. Other valid values are remote for custom recipients and dl for distribution list. |
| Mode | This field describes what should be done with this object ¾ create, modify, and delete are valid options. The default is create. |
| Common-Name | The directory name of the mailbox. This can't be changed later without deleting the mailbox and re-creating it. Change it now to match your naming convention. This defaults to the mailbox name, with extended characters removed. |
| Display-Name | The name as displayed in the Address Book. |
| Given-Name | The first name of a mailbox user. |
| Surname | The last name of a mailbox user. |
| Home-Server | The home server of the mailbox. You can move a mailbox within the site later without difficulty, but you should decide where each group of mailboxes is to be created. |
| Comment | This is the comment that appears in the Address Book. It can be used to distinguish between two people with the same or similar names or for notes about contacts for calendar resources. |
| Assoc-NT-Account | Each mailbox needs an associated Windows NT account which has user access. On a calendar resource account, this can be a Windows NT group or account that is responsible for managing the resource or the administrator who is going to log on to the account once to set up forwarding rules and calendar permissions. |
You can add additional directory import fields after Assoc-NT-Account.
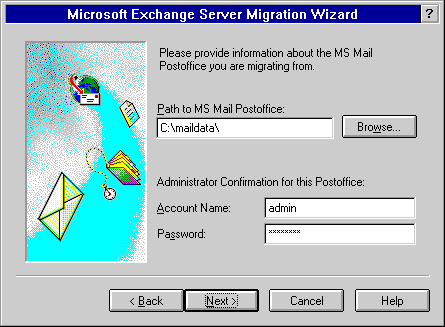
After creating the user list and modifying it, you can migrate mailboxes from the postoffice to your site. This does not delete the mailboxes or remove mail. It copies the information to the Microsoft Exchange Server computers where the new mailboxes are created. Before you start migrating mailboxes, map a drive letter or connect to a server where the postoffice resides. You will need read/write access to the share or volume and have the name and password of the administrator.
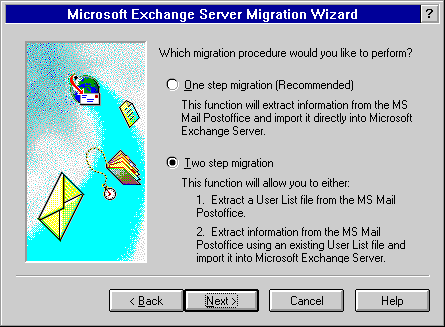
 To migrate mailboxes from a postoffice to Microsoft Exchange Server with a user list

| Option | Description |
|---|---|
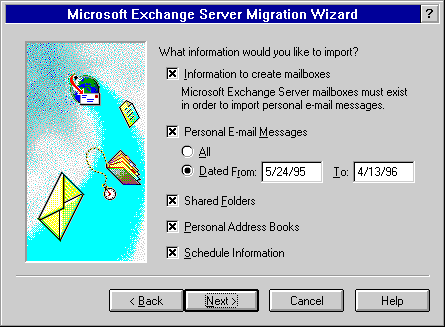
| Information to create mailboxes | Creates mailboxes for the selected users in the user list file. Clearing this check box imports messages to existing mailboxes or converts existing custom recipients to mailboxes. |
| Personal E-mail Messages | Copies messages and folders from the selected user's mailbox and server based MMF. You can select all messages or set a range . |
| Shared Folders | Copies all shared folders to the public folder server of this server. |
| Personal Address Books | Copies PAB entries in the MMFs and puts them into the selected user's inbox in a special message. |
| Schedule Information | Copies calendar files from the CAL directory on the postoffice to a special message in the selected user's inbox. |
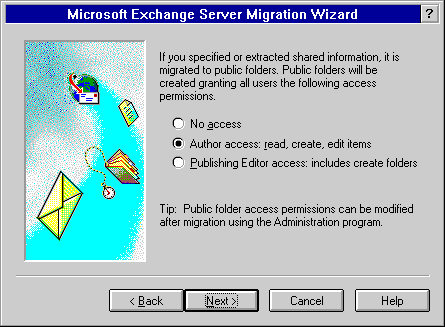
| Option | Description |
|---|---|
| No access | Creates public folders that only the administrator can access. |
| Author access | Creates public folders in which everyone can read existing messages and create new ones. The administrator is assigned Administrator permissions. |
| Publishing Editor access | Creates public folders and adds subfolder creation permissions in addition to author access. |
Note The administrator account that is being used to run the Migration Wizard is granted Administrator permissions for all public folders. Additional permissions can be assigned after the Migration Wizard has imported the folders.
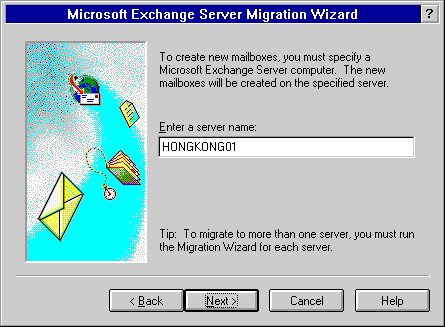
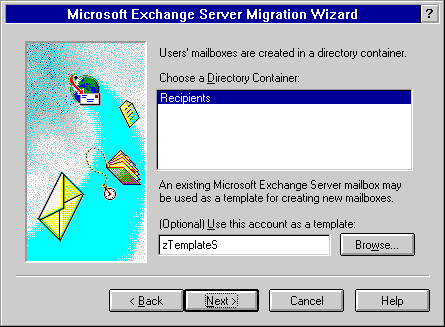
Note You cannot move a mailbox from one directory container to another after the mailbox has been created.
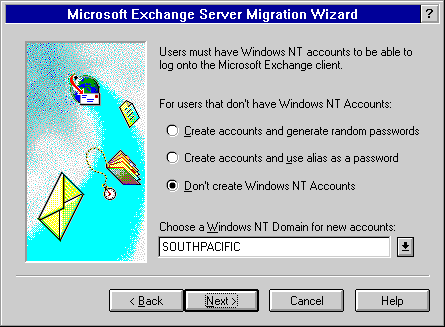
| Option | Description |
|---|---|
| Create accounts and generate random passwords | Accounts are created with names that match the common name and random passwords. The passwords are written to the ACCOUNT.PASSWORD file in the working directory of the Migration Wizard. For users to log on to Windows NT, you need to distribute these passwords. |
|
Create accounts and use alias as password |
Accounts are created with names and passwords that match the common name. |
| Don't create Windows NT accounts | If a Windows NT account that matches the common name of a mailbox does not exist, create the mailbox without an associated Windows NT account. No one will be able to access this mailbox until a Windows NT account is associated with it. |
Depending on your migration strategy, you can choose to delete the Microsoft Mail (PC) mailboxes or make the postoffice hidden. For information about how to back up the updated directory and information store, see Microsoft Exchange Server Maintenance and Troubleshooting.