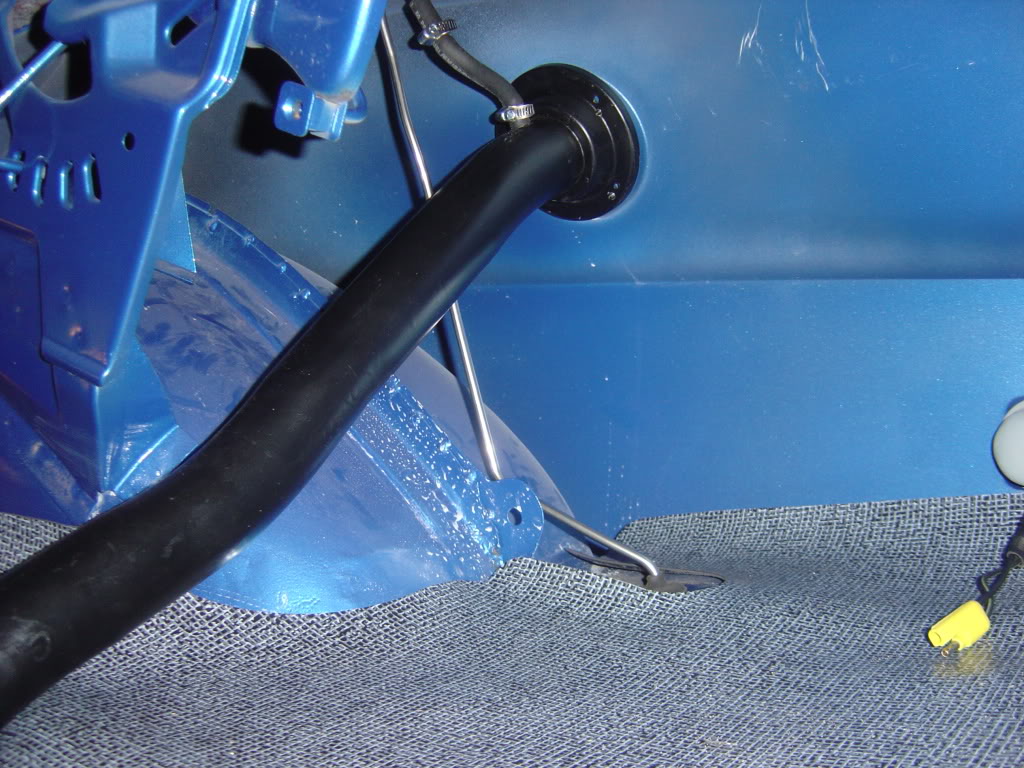
Don't even come close to lining up on my 70 Chally. The gas cap is an aftermarket flip cap from year one. The rear quarter is a Goodmark. I believe the filler tube is a good quality aftermarket as well. Not one of the 3 seem to line up screw holes. Should I drill the quarter panel and filer tube to line up with the flip cap? I can't do anything about the holes on the cap. I don't think you would be able to see the new drill holes if I do this. I'm not drilling into an original rear quarter, so I'm thinking I should just do this. What do you think?
Paul
20 posts
• Page 1 of 1
- The Toy Peddler
- Frequent Poster
- Posts: 137
- Joined: 01 Feb 2009 16:26
- Location: Grants Pass, Oregon
If I rotate it, the vent tube won't be in the proper position. Either way, the quarter panel needs to be modified. One more quick question. I believe there should be a gasket between the chrome trim "ring" on the flip to gas cap, but should I put one between the filler tube and the inside of the quarter panel?
Thanks for the help.
Paul
Thanks for the help.
Paul
- The Toy Peddler
- Frequent Poster
- Posts: 137
- Joined: 01 Feb 2009 16:26
- Location: Grants Pass, Oregon
- Moparman1972
- Frequent Poster
- Posts: 538
- Joined: 29 Apr 2006 17:10
- Location: Connecticut
The fill cap area on the Goodmark quarters is a known problem area. What people have been saying is that the recessed area isn't deep enough which makes the cap stick out too far. Some people have cut out that area and re-used their origonal to fix the problem. The bodyshop had to modify my car in that area as well but I'm not sure what they did to fix it. My car is just using the standard gas cap so maybe it isn't as big of a fix as it would be if I was using a flip top.
There is also a body line issue twards the back. Right around the side marker area, the body line isn't straight. Make sure to fix that or it will be very noticable.
The Goodmark quarters are also a thinner gauge than factory. Make sure to have undercoating sprayed on the inner quarters for added strength and protection. The factory did this too. If you are going for a stock look, the undercoating should be applied before the trunk gets painted.
-
burdar - Frequent Poster
- Posts: 429
- Joined: 24 Mar 2009 17:27
- Location: Iowa
The car is totally painted except for the hood. The recess doesn't seem to be a real problem and if all it takes is a little drilling to line up the holes it should be o.k. I think Goodmark did some retooling as I heard the early ones really weren't very good on the lines. I think these look pretty good now though.
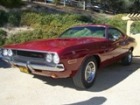
It's a little more complete than this now but here's a pic.
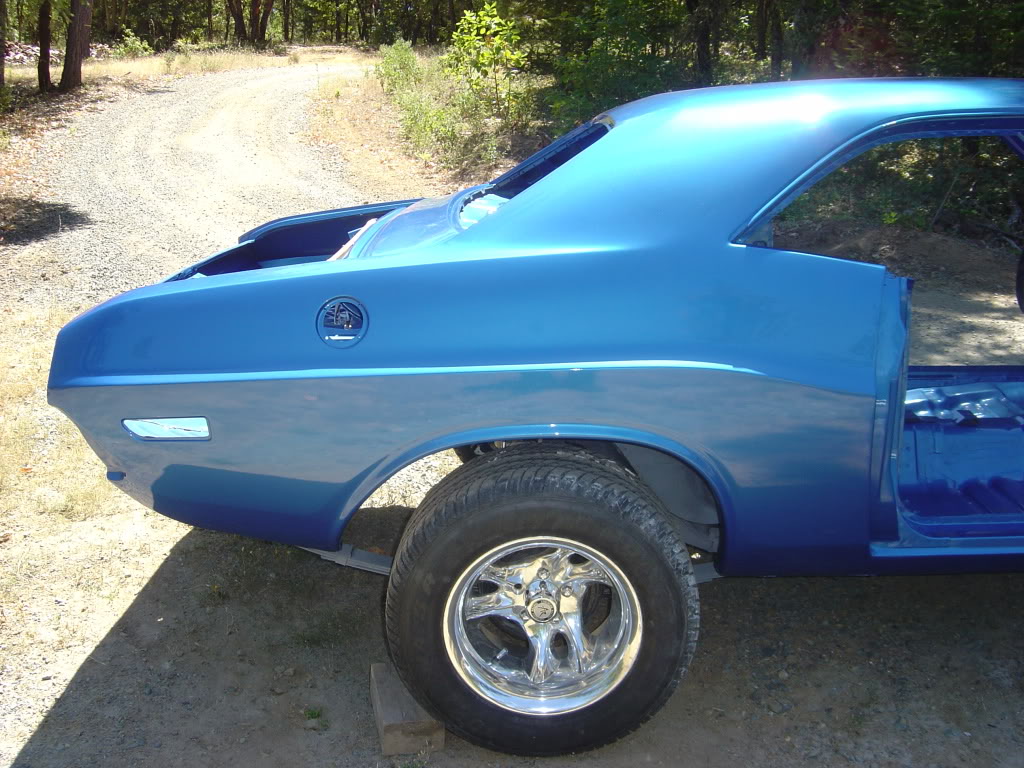
It's a little more complete than this now but here's a pic.

- The Toy Peddler
- Frequent Poster
- Posts: 137
- Joined: 01 Feb 2009 16:26
- Location: Grants Pass, Oregon
burdar,
You were correct about the area around the gas cap. I just went out and worked on it. There is a slight difference in the depth and also the circumferance there. Luckily all I had to do was take the flip cap screw hole areas and grind off about 1/32 of an inch on the bottom and edges and it fit fine. I did have to drill new holes. You are also correct in that the metal on the aftermarket quarters is thin. The tungsten drill bit "jumped" through the new holes. The filler line was a little more formitable. They all ligned up and it is now installed!
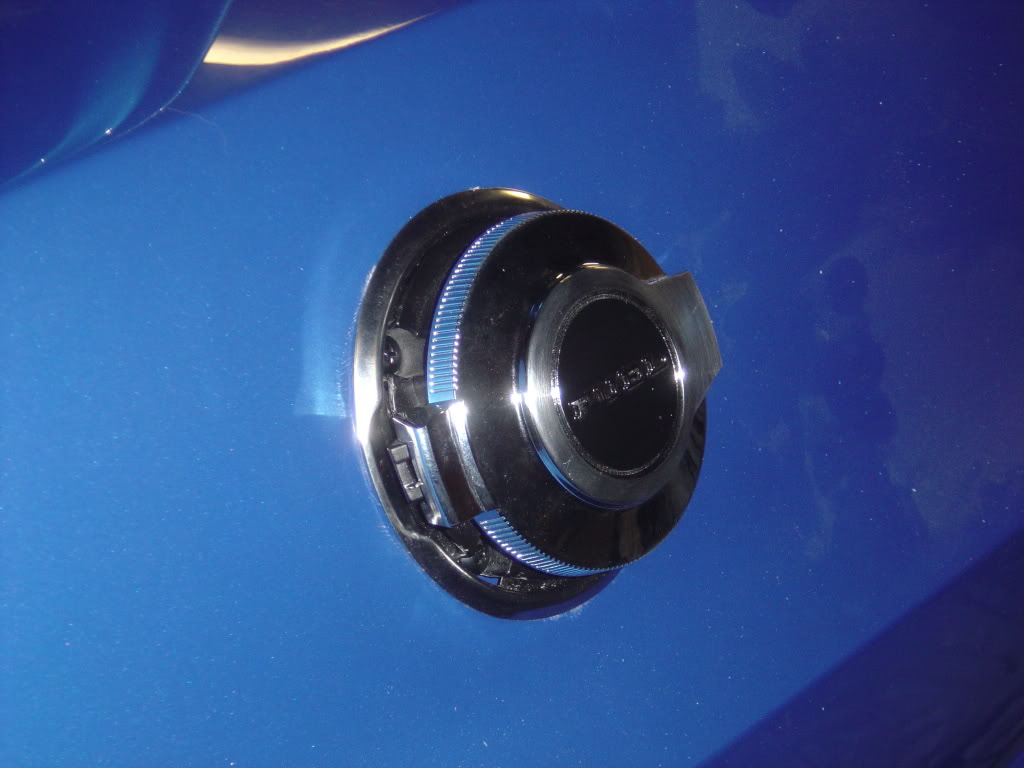
You were correct about the area around the gas cap. I just went out and worked on it. There is a slight difference in the depth and also the circumferance there. Luckily all I had to do was take the flip cap screw hole areas and grind off about 1/32 of an inch on the bottom and edges and it fit fine. I did have to drill new holes. You are also correct in that the metal on the aftermarket quarters is thin. The tungsten drill bit "jumped" through the new holes. The filler line was a little more formitable. They all ligned up and it is now installed!

- The Toy Peddler
- Frequent Poster
- Posts: 137
- Joined: 01 Feb 2009 16:26
- Location: Grants Pass, Oregon
-

dave-r - Grumpy Old Man
- Posts: 9842
- Joined: 12 Oct 2003 21:45
- Location: North of the Tyne, England
I guess my question is: What position is the vent nipple coming off the filler tube just inside the trunk located in? Upright, or pointed horizontally towards the front. And if I am understanding you on this, the approx. 2 ft. tube that connects to it is open ended, or does it connect to the outlet near the sending unit? This car had no fuel tank, gas cap for lines when I got it.
Paul
Paul
- The Toy Peddler
- Frequent Poster
- Posts: 137
- Joined: 01 Feb 2009 16:26
- Location: Grants Pass, Oregon
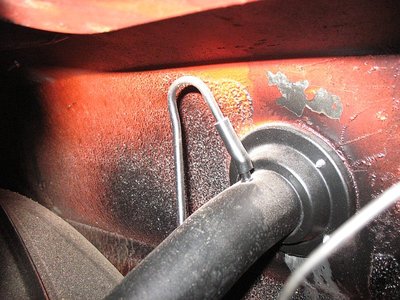
It has to be upright at the top of the tube to prevent fuel slopping into it.
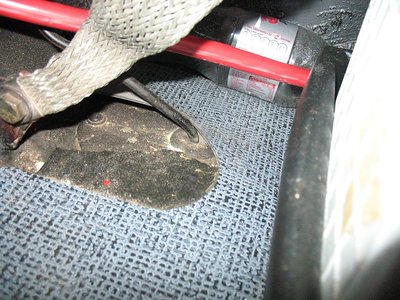
It then bends down and goes through a grommet in the trunk floor.
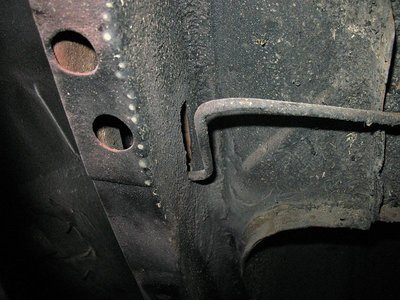
On the underside of the trunk floor it bends straight towards the chassis leg and ends just inside an opening there.
It does not go back to the tank and indeed it shouldn't because it is there to vent the tank and you don't want a closed system.
-

dave-r - Grumpy Old Man
- Posts: 9842
- Joined: 12 Oct 2003 21:45
- Location: North of the Tyne, England
Perfect! You are good. Great pics. I was afraid that I had the tube started in the wrong position. I just received the correct vent tubing from inlinetube and will install it today. That will make the trunk area pretty much done except for a spare and a jack.
So one more question since we are on this subject. On the sending unit, I have my 3/8" fuel line in. There is another smaller diameter tube. Is that a return line from the engine? Does that return all the way from the carbs? If so, I have another tube to buy and install.
Oops, one more. The electrical connection on the sending unit I'm sure is for the fuel gage. Does the ground wire to the tank connect there also?
You are a very big help! BTW, I checked out your drag race video! LOVE the sound of that thing. I can't wait to fire this puppy up!
Paul
- The Toy Peddler
- Frequent Poster
- Posts: 137
- Joined: 01 Feb 2009 16:26
- Location: Grants Pass, Oregon
The 5 volt feed from the fuel gauge is a purple wire (from memory) and it is the only wire that connects to the terminal on the sending unit.
The unit itself grounds via the fuel line. Normally you have a short rubber hose connecting the fuel line to the sending unit. This rubber hose has a steel clip that bridges the rubber tube and so completes the ground.
If your engine has return lines from the carb, attatch them to that smaller tube. Otherwise just block it off.
-

dave-r - Grumpy Old Man
- Posts: 9842
- Joined: 12 Oct 2003 21:45
- Location: North of the Tyne, England
I know why I was a little confused on the vent line. the trunk floor has been replaced and there is no hole for the vent tube to go through. I can see exactly by your pics where it should go through now. I laid down my trunk mat and it basically marked it out for me, along with checking the vent tube.
Now another question. Would it be better for me to just make a small hole large enough for the vent tube, or should I cut the nearly 1" hole and use a grommit?
Paul
Now another question. Would it be better for me to just make a small hole large enough for the vent tube, or should I cut the nearly 1" hole and use a grommit?
Paul
- The Toy Peddler
- Frequent Poster
- Posts: 137
- Joined: 01 Feb 2009 16:26
- Location: Grants Pass, Oregon
20 posts
• Page 1 of 1
