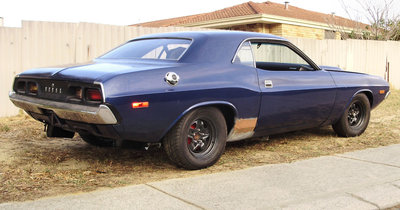
No one need to reply to this, but thought i would share my joy at a 'discovery' i made with my paint work. My 73 has an old 2-pack paint job (polyurethane clear over base colour). Its at least 15 years old, as the car has been in Oz for 13 years. And its showing its age.
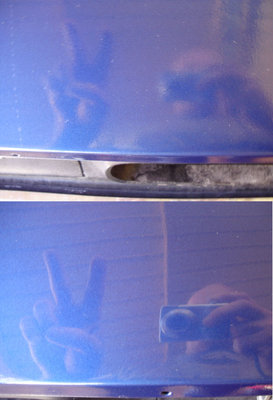
Well everyone is telling me you can't sand it and you can't use cutting polish on 2-pack as it will just dull the surface. They all say, you will have to re- paint the whole panel. I didn't have anything to lose so i got some 2000 grade wet-and-dry and using soapy water i lightly sanded an area of both the old paint and some new painted area i had done last month that had one of my horrible blends and paint runs. After sanding it looked very shiny when wet and very smooth; now the rough, crystally blended area was almost gone and the runs had been sanded down smooth. When it was dry, the surface was a satin finish. I got some cutting polish and rubbed hard with several applications, then folllowed by McGuires top coat finish polish. The result was that it came up like a mirror! Just great. I was very pleased.
12 posts
• Page 1 of 1
-

Eddie - Frequent Poster
- Posts: 6212
- Joined: 16 Oct 2006 21:26
- Location: Terre Haute, Ind.
-

patrick - Frequent Poster
- Posts: 1323
- Joined: 09 Jul 2007 0:56
- Location: Washington State, U.S.A.
-
Goldenblack440 - Frequent Poster
- Posts: 600
- Joined: 08 Jul 2007 18:57
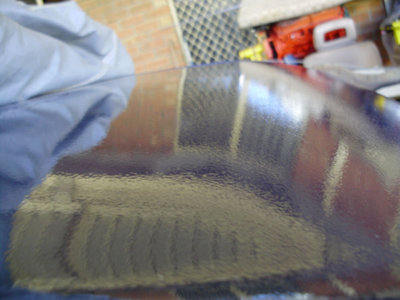
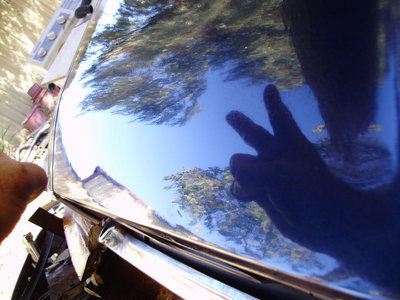
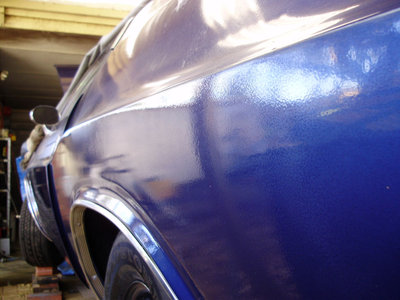
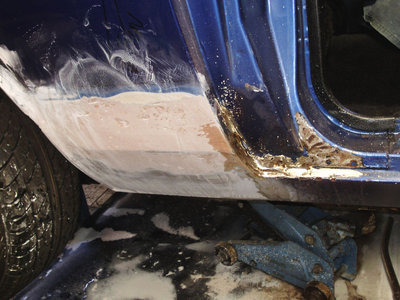
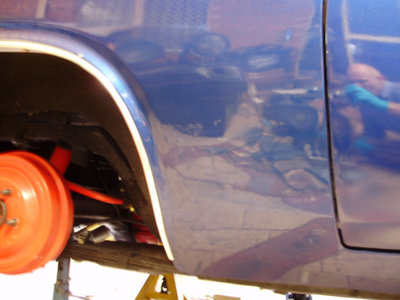
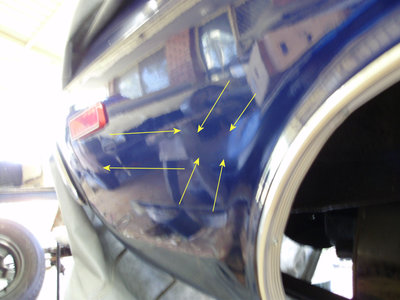
Ok, Ed and Patrick, here are some 'before' and 'after' shots with this technique. 1200 grade wet or dry with soapy water, followd by fresh 2000 grade. However i might try again with 800, then 1200, then 2000. As you can see the trunk lid looks to be a total disaster. That was my third attempt too. The colour is ok, but i got the clear coat wrong. This is what happens when you listen to self-professed 'experts'. The paint shop told me the thinning ratio, and turned out to be too thick. I had to work out the best ratio. The more coats of clear you do, the more 'orange peel' look you get. The first coat of clear looks like polished glass. After 3 coats there is a natural orange peel look that is about factory.
So this trunk lid is so badly orange-peeled it should be done again. I might one day, if i'm in the mood.
The other shot of left flank is still the 'Before' Havn't done much to that one yet.
So this trunk lid is so badly orange-peeled it should be done again. I might one day, if i'm in the mood.
The other shot of left flank is still the 'Before' Havn't done much to that one yet.
-

Goldenblack440 - Frequent Poster
- Posts: 600
- Joined: 08 Jul 2007 18:57
your doing well steve it looks great im with you on the thinning of paint you definately get a better finish if its thinner it just takes more coats to get coverage ( worse with some colours than others) post a pic of the rear 1/4 panel when youve done that to , it looks like the colour match is good
cheers ian
cheers ian
-

ianandjess - Frequent Poster
- Posts: 687
- Joined: 10 Dec 2005 12:18
- Location: australia
Big Difference Steve! The 'wet sanding' removed the peaks, now it's flat and the reflection is great! Great technique!! How are you applying the ClearCoat? The only luck I had was to apply it on very thick and wet.
-

Eddie - Frequent Poster
- Posts: 6212
- Joined: 16 Oct 2006 21:26
- Location: Terre Haute, Ind.
ianandjess wrote:it looks like the colour match is good
cheers ian
Gday Ian, thanks for that. Now i know you can rub back and buff 2-pack to a great finish, maybe not like it was just painted by a professional, but still 8/10. Here are some more i forgot to post. This one, the whole lower dogleg was replaced. It was supposed to be a quick aerosol paint job to get me through rego but turned out so well i might leave it. Can you believe i did the whole thing with 3 cans of Holts Touchup paint? Acrylic blended into the 2-pack colour, then with cheap Auto One Acrylic clear over the top. The weird thing is though, the colour that i matched from the colour of the plastic lid on the touchup can was a far better match than the paintshop did with their $5000 computer matching system !!
-

Goldenblack440 - Frequent Poster
- Posts: 600
- Joined: 08 Jul 2007 18:57
airfuelEddie wrote:Big Difference Steve! The 'wet sanding' removed the peaks, now it's flat and the reflection is great! Great technique!! How are you applying the ClearCoat? The only luck I had was to apply it on very thick and wet.
Well the last post was some pictures of cheap clear coat out of a can. MIght not last though! If you look carefully i got a run in he paint (i'm good at runs), so i wiped it off. You can see the dimples, but its good enough for me.
The other 2 pack clear coat i did out of a gravity feed spray gun. Just a $180 gun, medium quality for a backyard hobbyist. Eddie, you are correct, the trick is to spray the clear coat as thick and wet as possible, WITHOUT getting runs or sags. Very difficult! Because as Ian says, you get a better finish with more thin coats. But the thinner it is...those runs creep up on you quick, believe me. At least i know now i can rub them back out, which is a relief.
-

Goldenblack440 - Frequent Poster
- Posts: 600
- Joined: 08 Jul 2007 18:57
Your the 'expert' Steve NOT me! I hate bodywork, it's much too involved and 'artistic' for me. I cant sign my name the same time each time.  But yes, the results I had were OK,,we used Base Coat Cleacoat 2 stage with some reducer for the summer heat I think. We used a Sata Paint gun and the paint was NAPA brand,(3M made I think), it wasnt the 'high dollar' stuff which is VERY expensive. You get what you pay for in body materials/chemicals. Your work looks very good!
  BTW,,when you say 'out of a can' you dont mean the 'rattle can' clear do you?
 BTW,,when you say 'out of a can' you dont mean the 'rattle can' clear do you?
 -

Eddie - Frequent Poster
- Posts: 6212
- Joined: 16 Oct 2006 21:26
- Location: Terre Haute, Ind.
-

patrick - Frequent Poster
- Posts: 1323
- Joined: 09 Jul 2007 0:56
- Location: Washington State, U.S.A.
Thanks Patrick.
Eddie, the Sata guns are a very high quality! I think they start at about $800 over here and go up from there. Mine is only a Star brand gun. They have been in the business for 40 years, Made in Taiwan, but its not bad as the company is totally dedicated to their products, not like some overseas countries that just copy a good design as cheaply as possible to make millions of quick bucks.
Yes, rattle can ! Acrylic lacquer like from the factory, but in a spray can. Both colour and clear. That's why i'm amazed it came out so well. You would have the same things over there - you know, the large rack with hundreds of cans of colours to match the modern car colours. S.
airfuelEddie wrote:We used a Sata Paint gun and the paint was NAPA brand,(3M made I think), it wasnt the 'high dollar' stuff which is VERY expensive. You get what you pay for in body materials/chemicals. Your work looks very good!BTW,,when you say 'out of a can' you dont mean the 'rattle can' clear do you?
Eddie, the Sata guns are a very high quality! I think they start at about $800 over here and go up from there. Mine is only a Star brand gun. They have been in the business for 40 years, Made in Taiwan, but its not bad as the company is totally dedicated to their products, not like some overseas countries that just copy a good design as cheaply as possible to make millions of quick bucks.
Yes, rattle can ! Acrylic lacquer like from the factory, but in a spray can. Both colour and clear. That's why i'm amazed it came out so well. You would have the same things over there - you know, the large rack with hundreds of cans of colours to match the modern car colours. S.
-

Goldenblack440 - Frequent Poster
- Posts: 600
- Joined: 08 Jul 2007 18:57
12 posts
• Page 1 of 1

