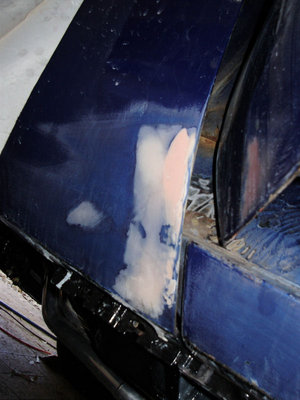
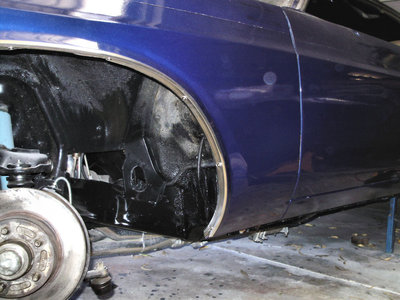
Hi all- are there any fellows here with some spray painting experience who can offer advice on using 2pack? Can't see any older posts covering this... I know many will say, "leave it for a professional- especially on a Challenger!" Well, you are right, but this is my driver car, it has a 15+ year old two pack paint job already and i am saving my $$ for my 71 RT Clone. So i am doing as much as possible myself. I have a reasonable quality spray gun for the primer/filler and a good quality gravity feed gun with a fine nozzle for the colour.
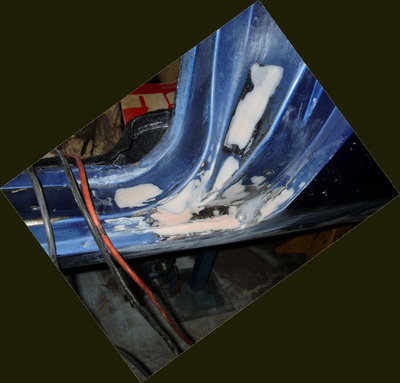
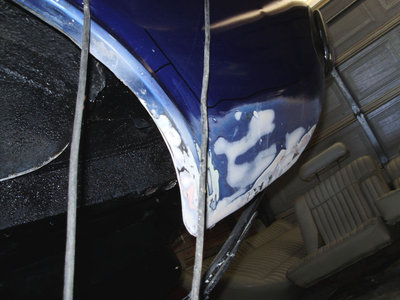
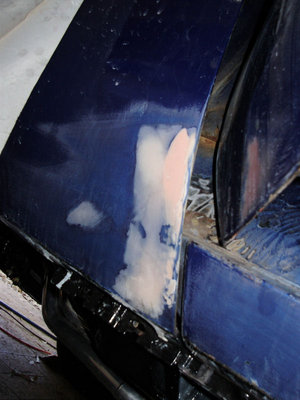
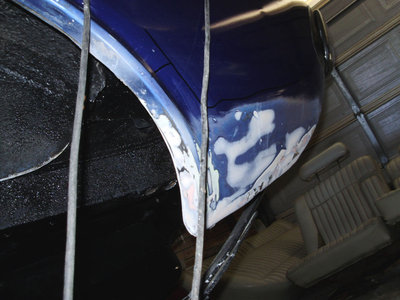
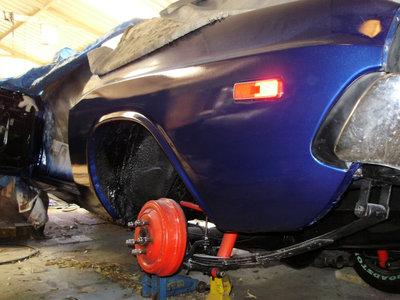
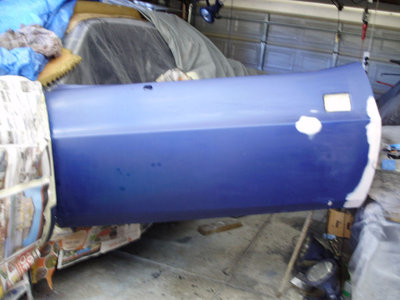
The photos show where i am up to. I have treated and filled the rust holes with fibreglass filler and sanded back nice, ready for the two pack primer/filler. I have 1 litre of two pack computer matched to the colour and I will have to blend all these areas into the existing paint. After masking off the areas to be painted, these will be primed/filled with two-pack primer, then the edges sanded back flush. Note, the bog makes the damage look far worse than it was, most of the bog is just filling small depressions.
Then not sure how to blend in the new colour with the old to get as close to invisible seam. Is there a special technique, or do i still have to mask off? do i raise the mask off area, or just use a sheet or cover with the edge hanging down so that some deliberate overspray provides the blend? Maybe some clear over both new and old areas?
Thanks for any knowledgable suggestions.
7 posts
• Page 1 of 1
I don't know about using 2Pack, but did a similar repair on my lacquer finish (no clear coat). I found it easier to blend or feather the edges rather then a hard masked line on the open panels.
If you have a panel edge of body line nearby, masking works well and can actually enhance the "crispness' of the line. Just be careful not to burn thru the old paint when taking down the masked edge. Use a good quality tape that will not allow the paint to seep underneigth also. Remove the tape carefully as sometimes the new paint will pull away and give a jagged line.
After it dried well I used 1500 grit wet sand paper followed by two levels of polish compound. The finest polish was used on the furthest areas just to take off the light over-spray. Hope this all makes sense.
-
Jon - Frequent Poster
- Posts: 1229
- Joined: 21 Aug 2005 15:12
- Location: Medford Oregon
gday steve only mask the areas when your priming & spray puttying & make sure you sand the mask line of when you wet sand the spray putty but dont mask for the colour you can for eg if painting the front gaurd then mask the hood & door but the panel you are painting shouldnt be masked or you will have a visible line
cheers ian
cheers ian
-

ianandjess - Frequent Poster
- Posts: 687
- Joined: 10 Dec 2005 12:18
- Location: australia
Thanks Jon and Ian, have copied these instructions into my general resto information, along with a really great reply from the Aussie Mopar Forum. Jon, i have tried to keep below the obvious body line but unfortunately have sanded right up to it in places so will have to be very careful there.
will post progress pics as i go.
meanwhile, i have taken the bonnet (hood) off my old 68 ute (utility or pickup as you call them) and am going to spray that for practice with the new gun. Can't go much wrong with Satin black acrylic (lacquer) !! But it will be good practice spraying a vertical surface, as it is easier to get the dreaded paint runs there.
all for now, thanks again
-
Goldenblack440 - Frequent Poster
- Posts: 600
- Joined: 08 Jul 2007 18:57
hey steve good to hear you have a practice piece but spraying acrylic is totally diferent to spraying 2k or enamel acrylic is applied in thin dry coat relatively speaking compared to 2k & enamel which is applied wetter & is much more critical when runs are concidered
cheers ian
cheers ian
-

ianandjess - Frequent Poster
- Posts: 687
- Joined: 10 Dec 2005 12:18
- Location: australia
Ah so? I heard that 2K goes further. Unfortunately i don't have enough 2K to practiice with, my main aim was to get to know the new gravity- feed gun i bought and to practice on a vertical surface, as that's how my car repair areas have to be sprayed (don't have a rotisserie!). But now that you mention it, i will be extra careful with runs and sags with the 2k. More thinner coats at a lower pressure might be the go
Will post shots after the event.
Will post shots after the event.
-

Goldenblack440 - Frequent Poster
- Posts: 600
- Joined: 08 Jul 2007 18:57
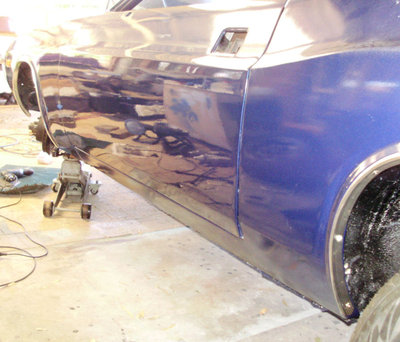
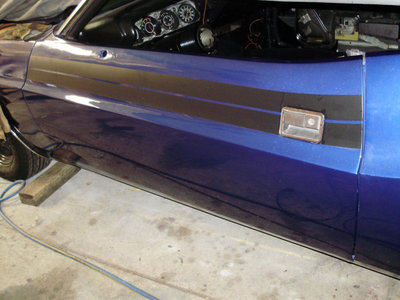
I have revived this topic to post some pictures of my recent attempt at rust repairs, paint and panel. 2-Pack paint used (polyurethane clear over basecoat). LHS of car only done so far. The paint match i got done by an expensive, new-fangled computer laser lite matcher - it was not that good. Passable, but not 100%. They said metallics were very hard to duplicate without a paintcode. This is an unknown colour, painted back in the States around 15 years ago. The rear quarter, i only painted up to the waistline ridge. It came up ok. The LHS door, i did the whole thing. The LHS front fender i blended into the smallest area of paint which was above the front wheel to reduce the impact. It came up very well. Its easy to blend the actual colour into the old colour. However, blending new clear into old clear is impossible to get perfect as i found. It will just leave a crystally rough finish over the old clear which cannot be cut and buffed successfully. This will only dull the surface. What i did was mask a vertical line at that smallest point and cleared up to that. But removing the masking tape of course left a ridge. I did not want to do the whole fender so i cheated. I only thought of this in a panic when the clear was still wet, so i wet a cotton-wool bud with reducer-thinner and rolled it over the ridge a few times. It was quite amazing how successful this was. I also did this on a few small runs in the clear when i got a bit keen with the gun.
-

Goldenblack440 - Frequent Poster
- Posts: 600
- Joined: 08 Jul 2007 18:57
7 posts
• Page 1 of 1
