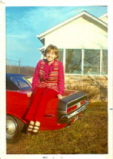
Decided to finally post some pictues of my project. It is a 72 Challenger, originally a 318 car. Didn't pay much for the car (you'll see why), and most of it was intact. Some rust but nothing too bad. Had a 440 short block (really needed more maching, probably should have started from scratch!) with the car, but it was not running.
Always tough to find time to work on it. Started with all the mechanicals (engine, trans, fuel, brakes, etc.).
With the great help of this site, have done everything so far myself, except the trans.
18 posts
• Page 1 of 1
 Viewed 754 times")
 Viewed 754 times")
-

MLMFLCN - Frequent Poster
- Posts: 238
- Joined: 10 Oct 2005 13:24
- Location: Ohio
 Viewed 754 times")
 Viewed 754 times")
 Viewed 754 times")
![]() by MLMFLCN » 21 Nov 2010 14:51
by MLMFLCN » 21 Nov 2010 14:51
few more...
-
 Viewed 754 times")
- Engine shot .. at home - finally!
-
 Viewed 754 times")
- After some effort...
-
 Viewed 754 times")
- Before...
-
 Viewed 754 times")
- After - New SSBC kit and poly kit installed. Knuckle breaking, but worth it.
-
 Viewed 754 times")
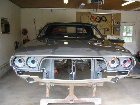
- front susbension - had front disc, all was shot...
 Viewed 754 times")
 Viewed 754 times")
 Viewed 754 times")
 Viewed 754 times")
 Viewed 754 times")
-
MLMFLCN - Frequent Poster
- Posts: 238
- Joined: 10 Oct 2005 13:24
- Location: Ohio

-

Adrian Worman - Frequent Poster
- Posts: 2051
- Joined: 10 Mar 2007 23:54
- Location: milton keynes
Re: 1972 Challenger
![]() by MLMFLCN » 11 Apr 2011 15:05
by MLMFLCN » 11 Apr 2011 15:05
Getting back into the interior, carpet and panels all in. Originally, a yellow interior. Used Year One interior paint, seems a little more delicate than I would like. Has anyone used a clear or something over the panels to provide some durability? Also, is there a panel to cover the spot in front of the heater core/box? Mine seems naked? Any photo replies would be great. Thanks
 Viewed 731 times")
-
MLMFLCN - Frequent Poster
- Posts: 238
- Joined: 10 Oct 2005 13:24
- Location: Ohio
Re: 1972 Challenger
![]() by Adrian Worman » 11 Apr 2011 15:28
by Adrian Worman » 11 Apr 2011 15:28
Nice stuff you've done there  check the interior section cos Chuck just embarked on some epic door panel painting job, came out really nice for him as well
Jesus built my hot rod
-
Adrian Worman - Frequent Poster
- Posts: 2051
- Joined: 10 Mar 2007 23:54
- Location: milton keynes
-

Eddie - Frequent Poster
- Posts: 6212
- Joined: 16 Oct 2006 21:26
- Location: Terre Haute, Ind.
Re: 1972 Challenger
![]() by MLMFLCN » 20 Jul 2011 3:47
by MLMFLCN » 20 Jul 2011 3:47
Finally some time to work on the car. Did a bunch of sanding and filling over the last 2 months to get it ready to prime. Will pay someone to do the B5 BC/CC, but wanted to attempt the primer coat and bulk of the body repairs myself. A good body guy will have some work to do. I have a real appreciation for all of you that do the intense metal work and body work, man is it is time consuming and "challenging". At least it is all in one color 
-
 Viewed 646 times")
- With the tape just off...
 Viewed 646 times")
-
MLMFLCN - Frequent Poster
- Posts: 238
- Joined: 10 Oct 2005 13:24
- Location: Ohio
 Viewed 646 times")
-
MLMFLCN - Frequent Poster
- Posts: 238
- Joined: 10 Oct 2005 13:24
- Location: Ohio
Re: 1972 Challenger
![]() by burdar » 20 Jul 2011 15:27
by burdar » 20 Jul 2011 15:27
You may want to reconsider that orange ECU. People have had nothing but problems with those recently. At the very least, I'd mount it on a factory standoff bracket to help it cool a little more.(instead of dirrectly on the firewall)
Looks like your making good progress. Are you planning on running the 14" Rallye's or do you have something else planned in the wheel department?
Looks like your making good progress. Are you planning on running the 14" Rallye's or do you have something else planned in the wheel department?
-
burdar - Frequent Poster
- Posts: 429
- Joined: 24 Mar 2009 17:27
- Location: Iowa
Re: 1972 Challenger
![]() by MLMFLCN » 20 Jul 2011 15:53
by MLMFLCN » 20 Jul 2011 15:53
Thanks for the tip. I have heard that too, and have a spare in the trunk (albeit another orange unit). What do you suggest? I do have the original unit and bracket, I will clean that up and mount it. This was part of the ignition kit, if I can remember that far back.
I like the look of the 14's, but probably will upgrade at some point. The 215's don't provide any traction. Any thoughts/photos on wheels? Planning on going to the nats, maybe try to find a deal. Car is obviously not a restoration, so whatever looks cool.
Thanks
I like the look of the 14's, but probably will upgrade at some point. The 215's don't provide any traction. Any thoughts/photos on wheels? Planning on going to the nats, maybe try to find a deal. Car is obviously not a restoration, so whatever looks cool.
Thanks
-
MLMFLCN - Frequent Poster
- Posts: 238
- Joined: 10 Oct 2005 13:24
- Location: Ohio
Re: 1972 Challenger
![]() by Adrian Worman » 20 Jul 2011 16:07
by Adrian Worman » 20 Jul 2011 16:07
I use an FBO ignition unit on a stand off plate, works lovely along with an FBO distributor.
For the wheels I don't think you can beat a set of chrome Magnum 500's in 15X8 with some redlines
For the wheels I don't think you can beat a set of chrome Magnum 500's in 15X8 with some redlines
Jesus built my hot rod
-
Adrian Worman - Frequent Poster
- Posts: 2051
- Joined: 10 Mar 2007 23:54
- Location: milton keynes
Re: 1972 Challenger
![]() by Eddie » 20 Jul 2011 18:14
by Eddie » 20 Jul 2011 18:14
I also use Don's recurved FBO dist. his lower resistance Ballast,(.45 Ohm instead of the .8 Ohm factory unit), which allows a bit higher voltage to the coil, and his Coil. I have 20 degrees initial and 14 mechanical and 12 degrees of vacum advance. It's never ran this good! The MoPar Perf. Orange Box is a sub-par unit. His Transistor is more robust with better electronics. Deleting the vacum advance will result in less driveability, more frequent plug changes, carboned up combustion chambers and possibly long term valve seat damage from less heat transfer to the head from the valve seat due to high carbon build-up. On a race only engine it's fine I did also use his re-curved dizzy on my stroker with junk plug wires and it still made well over 600 H.P. so thats 2 engines I use his stuff on. Good Luck Rich!! I agree with Adrian, Magnums, Rallye's and the wheels dave used are my favorites but Drew's wheels are badass too! I think I'm gonna use my 15" Cop Car steelies until I get it on the road,(my 72), and then I will save up for a set of 17" X 8" alloy wheels and some good meats so the 72 can keep up with drew's rocket. 
-
Eddie - Frequent Poster
- Posts: 6212
- Joined: 16 Oct 2006 21:26
- Location: Terre Haute, Ind.
Re: 1972 Challenger
![]() by burdar » 20 Jul 2011 19:53
by burdar » 20 Jul 2011 19:53
15" magnums would look great. For some reason, the 14" Rallye's just don't look right to me on the E-bodies. There is a company that makes some 17" and 18" magnum rims that really look nice. They are pretty expensive though. If I was building a modified car, that's what I'd run.
Since you have a spare box, you can just run the orange box until something happens. I think a cheap parts store box would be better then the orange box. Hopefully you won't have any issues.
If the paint you used on the interior panels doesn't hold up, look into the SEM line of paints. That's what I'm using on my interior panels. So far, everything I've done looks great. Use the SEM Adhesion Promoter per the instructions followed by SEM Landau Black. The Landau Black very closely matches the gloss level of the original plastic.
-
burdar - Frequent Poster
- Posts: 429
- Joined: 24 Mar 2009 17:27
- Location: Iowa
Re: 1972 Challenger
![]() by MLMFLCN » 20 Jul 2011 20:16
by MLMFLCN » 20 Jul 2011 20:16
Thanks Burdar. Saw your grille, that really came out nice. The year one stuff was a great color and coverage, but scratches so easily. I will look into SEM. Did you buy by the quart or rattle cans? Did you paint the rear tailpan (space between the taillights, not sure if that is the right name) with the same SEM black you used on the grille?
Thanks,
Thanks,
-
MLMFLCN - Frequent Poster
- Posts: 238
- Joined: 10 Oct 2005 13:24
- Location: Ohio
Re: 1972 Challenger
![]() by redgum78 » 21 Jul 2011 10:00
by redgum78 » 21 Jul 2011 10:00
Nice progress you are making there MLMFLCN. I agree with Burdar 15 " Magnums look nice.
-

redgum78 - Frequent Poster
- Posts: 170
- Joined: 15 Mar 2009 9:26
- Location: Australia
Re: 1972 Challenger
![]() by burdar » 21 Jul 2011 13:19
by burdar » 21 Jul 2011 13:19
I don't have any spray equipment so I've just been using spray cans. I've been very impressed with the durability of the SEM spray can paint though. Much higher quality then other cheaper brands. I've been using a lot of SEM Trim Black. Once it has cured for 24 hours, it's very hard. Time will only tell how durable the paint is on plastics though.
The tail panel was sprayed with argent paint from Totally Auto. It turned out pretty good. I'll see how it holds up. Your options are limited when it comes to textured argent. You can use the spray cans but the colors and finish aren't very close to stock. The guy that painted my car had to use both the light and the dark argents to get a color that closely matched the original finish. The only other option is the sprayable argent from Rodger Gibson. It's more correct looking but is very expensive.
Since you're not going for a stock restoration, a semi-gloss paint like the SEM Trim Black would look good on the tail panel.
-
burdar - Frequent Poster
- Posts: 429
- Joined: 24 Mar 2009 17:27
- Location: Iowa
18 posts
• Page 1 of 1