Page 1 of 1
Now the real work starts

Posted:
13 Feb 2010 12:04by redgum78
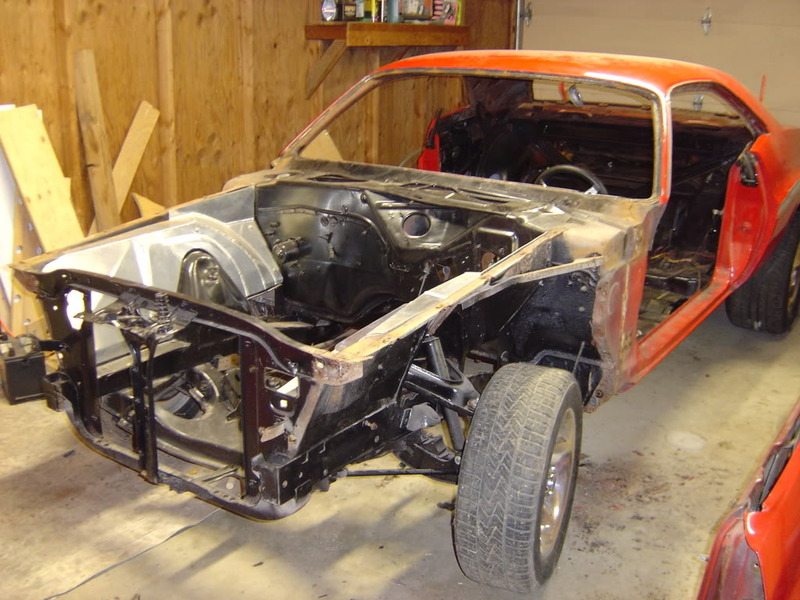
I got it back from the media blasters 2 days ago. I thought there might have been a suprise or two but it didn't reviel much that I didn't allready know about

.
There was a couple of small repairs on the doors and fenders that I hadn't noticed.
Lots of rust in all the normal spots

but I allready new about these.
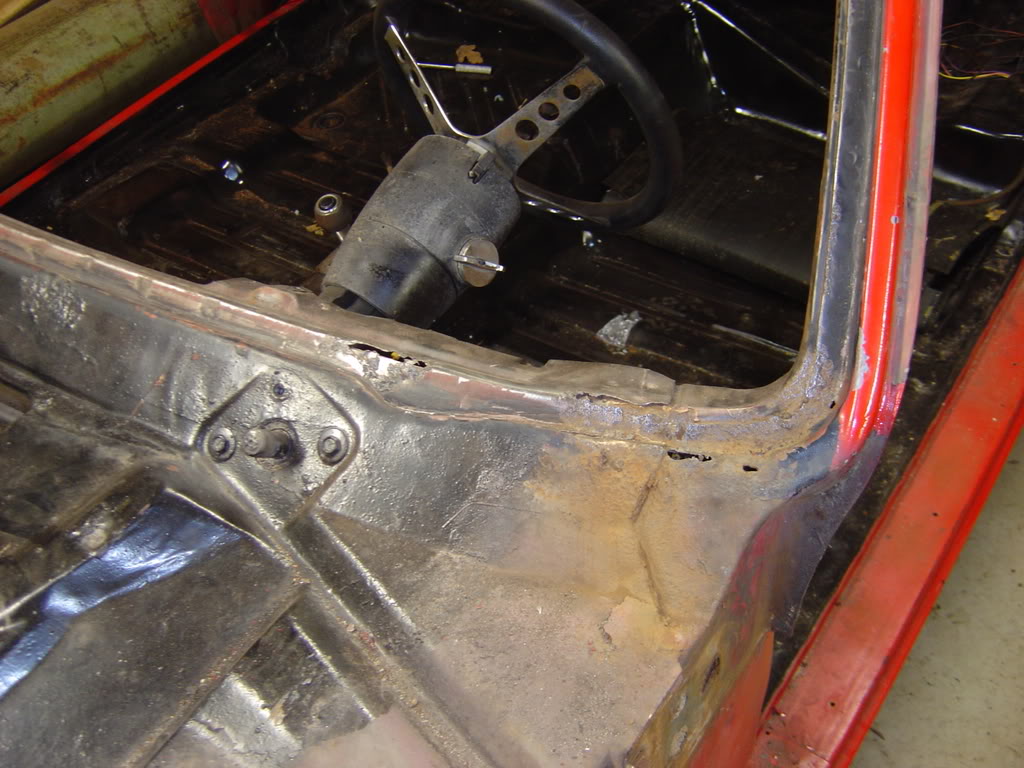
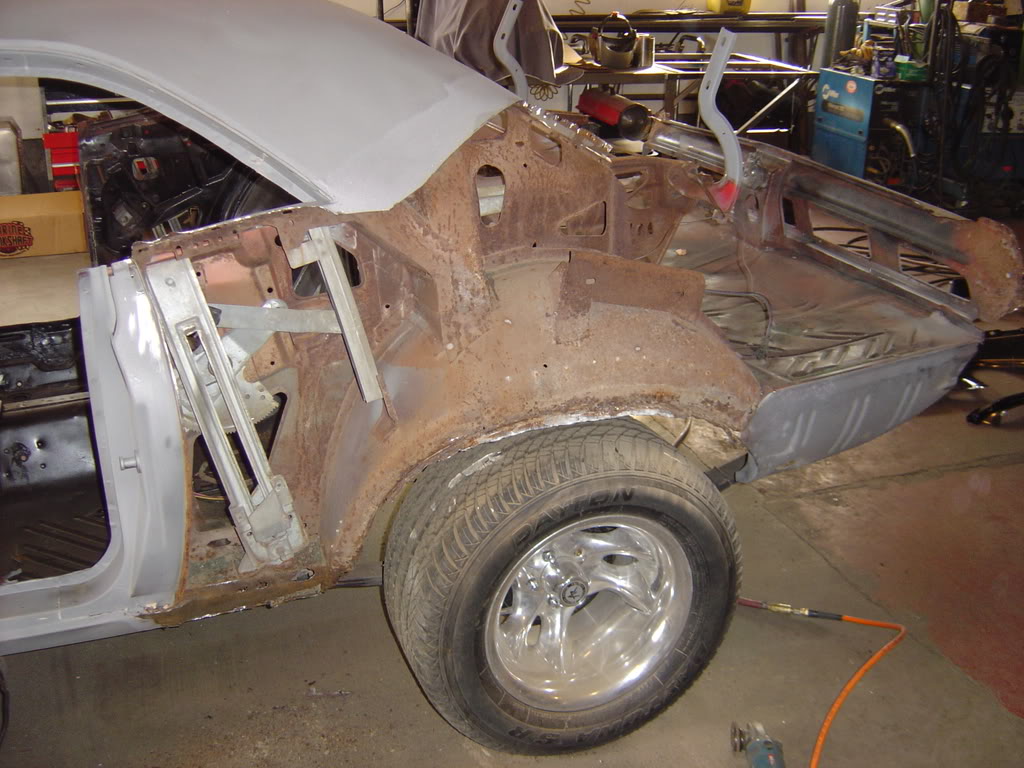
One nasty backyard repair on the passenger side rear quarter just behind the door. I new there was somthing dodgy there but once the filler came out .... well just take a look at the picture!
The floors were not too bad either, I had allready repaired the worst of them so I didn't bother with pictures.
How does this compare rust wise to some of the cars people on here have restored?
Posted:
13 Feb 2010 14:13by ianandjess
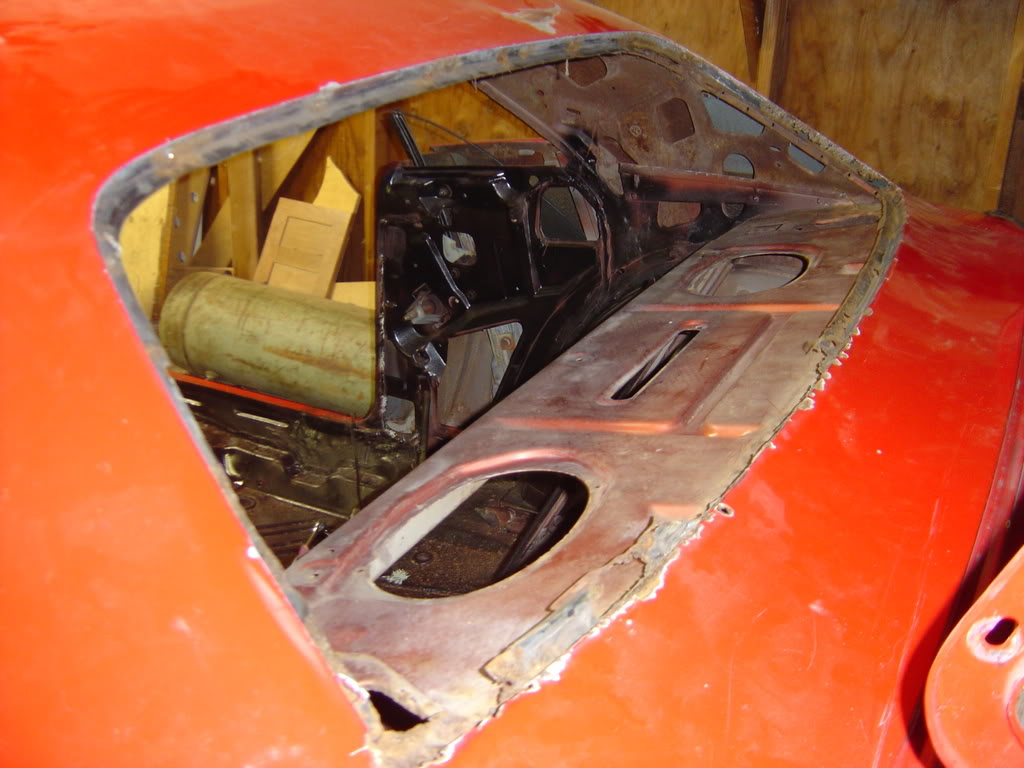
apart from the front windscreen rust & the shock tower it all looks quite minimal rust wise that rear 1/4 might take a bit of mucking about to get it right mine was a bit rough so i cut the bad section off & straightend it then welded it back on you might be able to do the same if you dont want to get a repro 1/4 panel
cheers ian
re:
Posted:
13 Feb 2010 18:17by cv70chall
You're in much better shape than I was when I started. the guy(s) who attempted to repair my car before I bought it cut too many corners!
I found a lot of rust in the same location as yours- passenger side past the door- and I decided to bite the bullet and replace both quarter panels.
I replaced all the floor pans- even though they didn't look too bad- just to be on the safe side.
Funny thing was - finding the old "chicken wire, bondo and pie plate crud in the left rear quarter!
Posted:
14 Feb 2010 11:17by redgum78
I plan on repairing what I can just because I like the idea of using the orginal panels if possible.
I will see how it goes with the bad 1/4 panel...no chicken wire or pie dishes but it had a good inch of filler and has lots of creases. i might try and reproduce the front section of it. The hard part will be the body line, I am playing around with an english wheel a bit so with practise it should be possible

Posted:
14 Feb 2010 12:57by ianandjess
cool danny let us know how you get on with the english wheel ive never had a go with 1 but they look so damn useful
cheers ian
Posted:
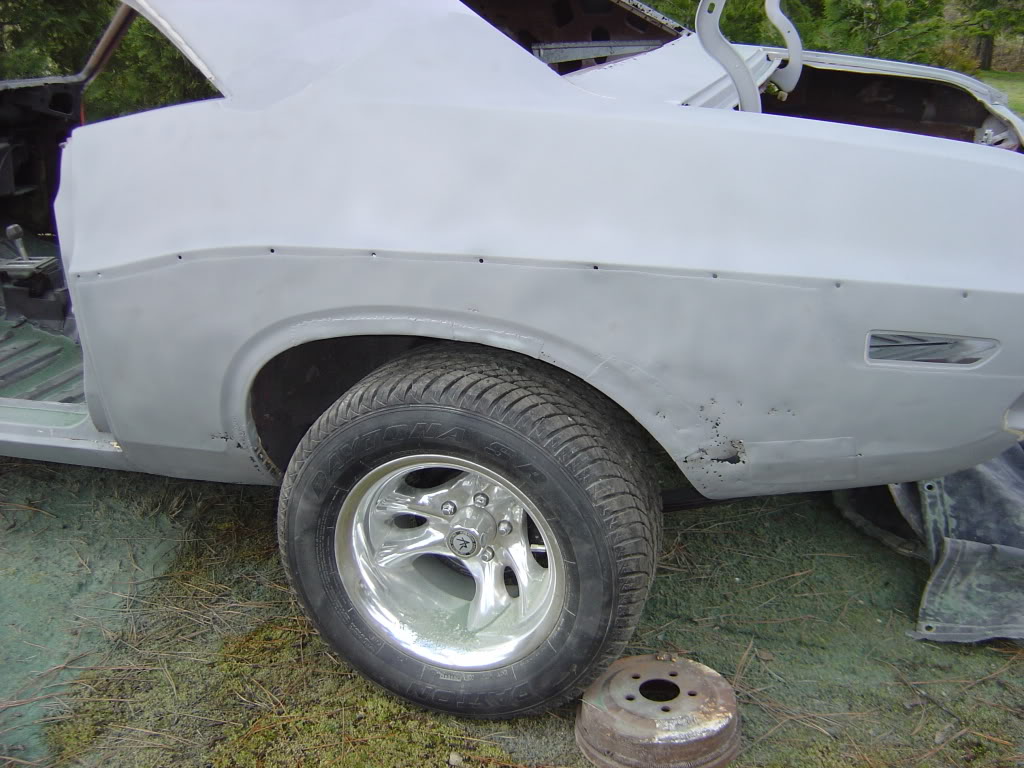
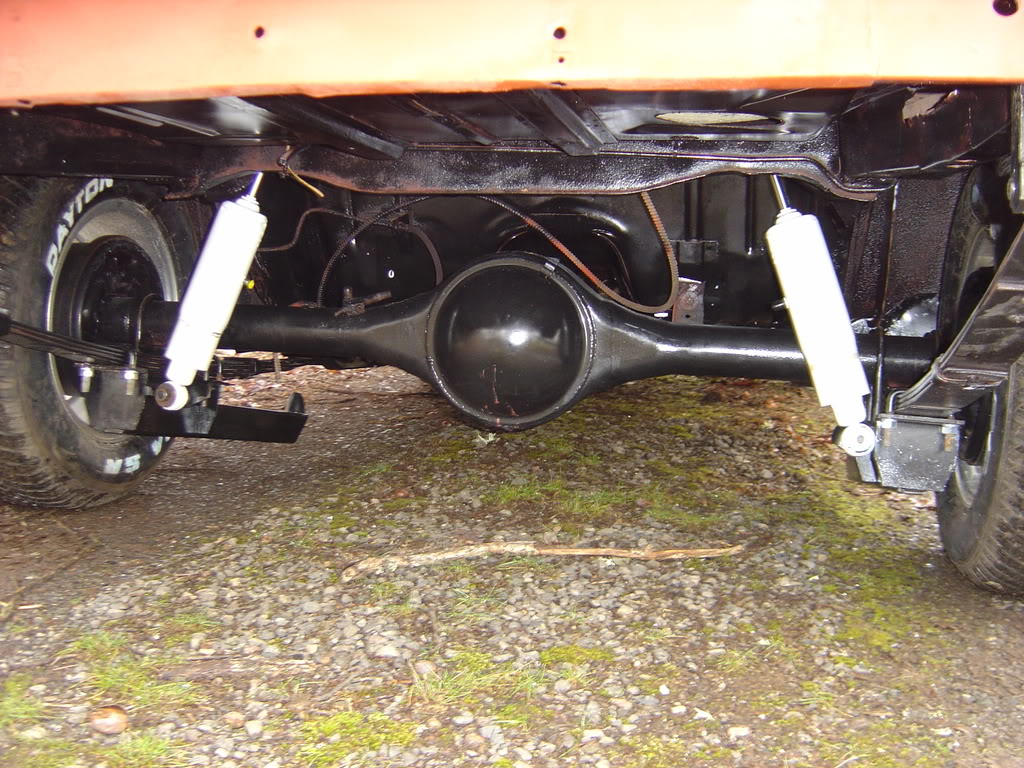
14 Feb 2010 14:00by The Toy Peddler
Posted:
14 Feb 2010 14:07by Eddie
Chevy slapper bars on a MoPar! Now thats RedNeck!
Posted:
14 Feb 2010 14:22by drewcrane
airfuelEddie wrote:Chevy slapper bars on a MoPar! Now thats RedNeck!
ye haaawwww

Posted:
14 Feb 2010 14:55by The Toy Peddler
They were the first thing I removed from the car! I couldn't even get it in the garage with those things on.
Posted:
14 Feb 2010 22:27by redgum78
ianandjess wrote:cool danny let us know how you get on with the english wheel ive never had a go with 1 but they look so damn useful
cheers ian
I have only made a few small panels with it so far but it seems to work well. I got keen about the idea after watching a 7 dvd training package by "Tom Peach and Peter Tommasini" (there is a few clips of them on youtube, well worth a watch). They are a couple of Aussie blokes doing old school panel repair and reproduction, they are very impressive to watch even if the production of the DVD's is a little dated.
Man does that look familiar! You have a lot of work to do, but it isn't impossible, just time consuming and expensive. Here's mine. It's all painted and being reassembled now
That does look familiar

I have been watching your progress...looking good

Progress report on my 70RT
Posted:
05 Nov 2010 12:44by redgum78
I havn't spent as much time in the shed as I would have liked over the last month or so but I have manages to get a little bit done here and there.
Posted:
05 Nov 2010 13:14by burdar
Looks like your making good progress. I'm gealous of all you guys that can do your own metal work. That car will be looking new in no time.
Posted:
06 Nov 2010 3:14by Jon
burdar wrote:Looks like your making good progress. I'm gealous of all you guys that can do your own metal work. That car will be looking new in no time.
I agree, metal work is an art. Much of time and patience.
Replacing the quarter seems like the best option too. Way to much damage to fret with on that section.

Posted:
06 Nov 2010 3:57by redgum78
Thanks for the comments guys. I am by no means an expert in metal work but I seem to be able to get by. I found doing the floor was realy good pratice for forming different compound shapes in new sheet metal and also good mig welding pratice.
I removed the other quarter this morning. The rear lower inner gaurd is fairly rusted. I will fabricate a new piece before fitting the new quarter. I thought the of section inner guard around the wheel arch might need replacement (I had to cut out and make a new piece for the other side) but it looks quite good.
I have been using Por 15 to treat all of these kinds of places, the bloke at the paint shop tells me it is the best stuff on the market? Anyone else used it?
Posted:
07 Nov 2010 12:22by ianandjess
good to see your making good progress danny
cheers ian
Posted:
08 Nov 2010 22:48by redgum78
Thanks Ian.
Slowly but surely.
Posted:
09 Nov 2010 4:24by Jon
Careful with the fumes from those rust inhibators. They can have some nasty side effects.

Rust Bullet landed me a doctor visit.

Posted:
09 Nov 2010 8:30by RedRaven
Ah......I see.......Eddie drinks thats stuff...but he does it the safe way........he waters it down with coolant so to sweeten the taste........Dave.........he just drinks the shit neat.........it does wonders for his hairy wolkman jack syndrome........gives him a nice shiny coat......lol
Posted:
09 Nov 2010 10:40by redgum78
Careful with the fumes from those rust inhibators. They can have some nasty side effects. Rust Bullet landed me a doctor visit.
Thanks for the tip. That might explain all the pretty colors I have been seeing
Re: Now the real work starts
Posted:
17 Jul 2011 5:24by redgum78
Hi guys. I haven’t updated this post for a while but better late than never. The work is slow due to family and work taking up most of my time but it is moving forward.
In short:
-Floor and trunk pans had all the rust removed and replaced with new patch panels. I made all the patch panels myself. I made a jig to put the half round recesses in the panels so they still look original. If I was to do this again I would just buy repo ones, it just takes so long to hand make them. The complete pan (top and bottom) is now coated in POR15 then over coated with rubberised spray on body deadener which is also a sealer and rust inhibitor.
-Both rear quarters replaced with new skins. They went on ok but there is a lot of work getting the lines right as the skins were not perfect. I also had to replace the trunk extension on the LHS (again I made this but would just buy a repo one next time) and had to replace the lower lip on the RHS trunk extension.
-I sprayed the body in high build primer and am currently blocking it back. This is the 1st car I have done serious body work on and I am really surprised at how much time is evolved in blocking it down to get all the panels straight and the body lines true. My trade is mechanics so I am looking forward to getting paint on this thing and getting into the mechanical and electrical work.
Re: Now the real work starts
Posted:
17 Jul 2011 9:09by Adrian Worman
Next time I get a project I think I'm gonna fly you over
Re: Now the real work starts
Posted:
17 Jul 2011 10:54by RedRaven
Great work indeed.

Re: Now the real work starts
Posted:
21 Jul 2011 5:19by patrick
Looks really good! Great progress!!!

A lot of us are dealing with some of the same issues. I wish I had some of your same skill's! Could save lot's of dollar's!!

Re: Now the real work starts
Posted:
22 Jul 2011 8:34by redgum78
Thanks for the positive comments guys and to everyone who is active on the message board. It really helps to motivate me on my project.
Re: Now the real work starts
Posted:
22 Jul 2011 12:51by burdar
Great work! It looks like your doing it the right way...taking your time to get it right instead of rushing it to get it back on the road.
You may already know this but I'll mension it anyway. Now is the perfect time to test fit all of your trim items. Test fit the wheelwell mouldings, tail panel mouldings and side marker lights. Make sure all of your rear glass interior trim holes are in good shape and not stripped out. If you replaced the entire quarter, test fit the quarter window fuzzies...the holes aren't drilled in the right place on the new full quarters. You don't want to be test fitting all that stuff AFTER the car is painted.
Re: Now the real work starts
Posted:
22 Jul 2011 13:00by cv70chall
Wow.
I look at these photos and re-live all I've been going through. Great work!