My '73

Postby blackmagic73 » 07 Jun 2008 20:22

Well, I figured I might as well show you all what I've been working on. My roommate and I decided to get a project to work on during our spare time down at Navy flight school (both of us are Coasties, though, just to get that straight). We ended up finding this '73 out near Baton Rouge. Black, 318, auto with a/c. Engine and tranny aren't original and weren't in the car. Interestingly, the car still had a '74/'75 Louisiana license plate. Floor pans were toast, but the trunk and frame rails were fine (with the exception of the passenger side rear dogleg).
Anyway, we pulled her apart, I've been doing a bunch of welding and painting (POR-15 is great stuff). Decided she'll eventually be a color called Java Black Pearl. It's a Subaru color, but it is gorgeous and is exactly what I was looking for. I wanted a black with a gold metallic in it. For now, the 318 stays, we'll see how I like it.
Image
Image
Image
I'll post some more of the resto process once I get the pictures off my roomie's camera.
blackmagic73
Frequent Poster
 
Posts: 73
Joined: 28 Feb 2008 1:55
Location: Mobile, AL

Postby drewcrane » 07 Jun 2008 21:10

yes i would like to see some resto pix , you have your work cut out for your self! :s006:
User avatar
drewcrane
Frequent Poster
 
Posts: 2893
Joined: 01 Sep 2007 12:36
Location: "follow the laraya belt ,that should get ya there"

Postby blackmagic73 » 06 Jul 2008 3:55

So here's some pictures from the refurbishing process. These are actually a little out of date, from a couple months ago or so. I haven't loaded up the latest from my roommate's camera.
Anyway, here goes.
Image
This is after pulling the fenders and all.
Image
and after some extensive cleaning and a coat of POR-15
Image
old floorpans
Image
new floorpans
blackmagic73
Frequent Poster
 
Posts: 73
Joined: 28 Feb 2008 1:55
Location: Mobile, AL

Postby blackmagic73 » 06 Jul 2008 3:57

And here's the frame-rail section I fabricated. Old one was rusted through at the bottom, and finding a replacement section proved far more frustrating and time consuming than cutting and welding some steel. You might be able to tell from the heat marks that it's boxed inside for a bit of added strength. I sized it to lap over the edge of the remaining frame rail because I trusted that a little more than I did a butt-weld. Doesn't look factory perfect, but it is functional and unless you're under the car and looking for it you'd likely not even notice.
Image
Image
More to follow sometime soon...
I'm actually closing in on my goal of having the car painted by the time I leave primary flight training, which is in about a month. Crazy.
blackmagic73
Frequent Poster
 
Posts: 73
Joined: 28 Feb 2008 1:55
Location: Mobile, AL

Postby patrick » 06 Jul 2008 5:23

Wow! :thumbsup: Keep up the good work, Black Magic!
User avatar
patrick
Frequent Poster
 
Posts: 1323
Joined: 09 Jul 2007 0:56
Location: Washington State, U.S.A.

Postby blackmagic73 » 07 Jul 2008 0:34

So here's some up to date pictures of my current progress. Still need to get some photos of the suspension, but here's the interior and body. Next on the to do list is finishing the suspension so I can actually roll it out of the garage (which needs a thorough cleaning), and strip/sand/fill/sand/prime/sand the exterior.
Here's a shot of the interior, painted in acrylic enamel and ready for caulking.
Image
And the doors and fenders are back on. I stuck the font fascia in just to see what it looks like.
Image
Contemplating the next step....
Image
blackmagic73
Frequent Poster
 
Posts: 73
Joined: 28 Feb 2008 1:55
Location: Mobile, AL

Postby Eddie » 07 Jul 2008 14:05

I see you use that POR-15 stuff as well. I used it on the engine I'm building. It's pretty amazing stuff eh? :lol:
User avatar
Eddie
Frequent Poster
 
Posts: 6212
Joined: 16 Oct 2006 21:26
Location: Terre Haute, Ind.

Postby dave-r » 07 Jul 2008 14:45

Impressive work. :wink: :thumbsup:
User avatar
dave-r
Grumpy Old Man
 
Posts: 9842
Joined: 12 Oct 2003 21:45
Location: North of the Tyne, England

Postby Eddie » 07 Jul 2008 14:55

Yes it is. Lots of hard work there 'BM73' nice going! :thumbsup:(I am quickly learning just how difficult and labor intensive body work is). You guys get ALL my respect. Engines/trannies are cake! :lol:
User avatar
Eddie
Frequent Poster
 
Posts: 6212
Joined: 16 Oct 2006 21:26
Location: Terre Haute, Ind.

Postby RedRaven » 07 Jul 2008 15:47

Ok now If feel totally useless!! :worry: I cant do any of that body work, engine you name it....I can break things mind you!! :thumbsup:
User avatar
RedRaven
Frequent Poster
 
Posts: 1995
Joined: 15 Jul 2007 20:09
Location: THE DOG HOUSE

Postby blackmagic73 » 07 Jul 2008 20:00

airfuelEddie wrote:I see you use that POR-15 stuff as well. I used it on the engine I'm building. It's pretty amazing stuff eh? :lol:

Yeah, POR-15 rocks. My Dad used it to coat the frame of his '78 Corvette and I really liked the results, so the vast majority of the interior and underbody of the Chally has a coat of the stuff. Had enough fun dealing with rust the first time around, don't feel the need to do it again in a few decades.
blackmagic73
Frequent Poster
 
Posts: 73
Joined: 28 Feb 2008 1:55
Location: Mobile, AL

Postby blackmagic73 » 07 Jul 2008 20:02

RedRaven wrote:Ok now If feel totally useless!! :worry: I cant do any of that body work, engine you name it....I can break things mind you!! :thumbsup:

To tell you the truth, I'd never done any sheet-metal work or much welding before I took on this project. I just figured the best way to learn was to have a reason to do so. (And forums like this certainly help the process)
blackmagic73
Frequent Poster
 
Posts: 73
Joined: 28 Feb 2008 1:55
Location: Mobile, AL

Postby blackmagic73 » 22 Jul 2008 23:06

I've had some time off recently, so I set to work getting the car painted. Several late nights were spent in the garage filling and sanding and sanding and refilling the areas I screwed up the first time, then sanding some more and finally priming.... then sanding, sanding, sanding. Right now there's only a couple areas left to prime and everything already primed has been sanded. Getting that nice smooth paint left after sanding almost becomes an obsession...
Anyway, the roof turned out much better than I thought it might, given its original condition. Probably should've just replaced it, but hey, it looks good now. Tomorrow I have to patch some holes in the wheel wells, then the suspension goes back on and the Challenger will feel sunlight for the first time in months. The garage needs a good sweeping....
Once everything is all set, I'm shooting color, getting some friends over to speed the sanding process and finishing that up.
Here's pictures, for the visually inclined.
Before priming
Image
After priming
Image
The roof after some glazing putty and sanding
Image
And after some rust converter, just for good luck
Image
blackmagic73
Frequent Poster
 
Posts: 73
Joined: 28 Feb 2008 1:55
Location: Mobile, AL

Postby blackmagic73 » 22 Jul 2008 23:07

The primed and partially sanded roof
Image
Rear quarter after priming and sanding
Image
Looking much better
Image
:wink:
Image
blackmagic73
Frequent Poster
 
Posts: 73
Joined: 28 Feb 2008 1:55
Location: Mobile, AL

Postby blackmagic73 » 22 Jul 2008 23:11

Just for a little comparison, here is the best shot of the roof I started with. (Yes, that is a giant dent you can see. It mostly popped out, though, and a hammer and dolly took care of most of the creases. Filler took care of the rest..:s022: )
Image
And a neat shot of Daisy (that's what we call her) before all this began...
Image
blackmagic73
Frequent Poster
 
Posts: 73
Joined: 28 Feb 2008 1:55
Location: Mobile, AL

Postby jh27n0b » 23 Jul 2008 9:30

Looking good :thumbsup: Daisy will look sweet.
Bob
User avatar
jh27n0b
Frequent Poster
 
Posts: 389
Joined: 02 Apr 2006 12:05
Location: Indiana

Postby ianandjess » 23 Jul 2008 12:39

thats coming along nicely i havent had a chance to get back to mine yet ive been to busy but im glad to see your progress keep up the good work
cheers ian
User avatar
ianandjess
Frequent Poster
 
Posts: 687
Joined: 10 Dec 2005 12:18
Location: australia

Postby patrick » 23 Jul 2008 14:02

Looking very nice, Black Magic! :thumbsup: I got some new bumper's for my 73', last week. I've had the front one off before, and is pretty simple. I haven't had the rear one off the car, though. My service manual just show's all the part's. Is there any special sequince in dissassembly and assembly? Should the rear valence be removed for better access? ETC...
Thank's, for any tip's! :mrgreen:
Patrick
User avatar
patrick
Frequent Poster
 
Posts: 1323
Joined: 09 Jul 2007 0:56
Location: Washington State, U.S.A.

Postby dave-r » 23 Jul 2008 16:58

patrick wrote:Is there any special sequince in dissassembly and assembly? Should the rear valence be removed for better access? ETC...
Thank's, for any tip's! :mrgreen:
Patrick


Where is the fun in that? :lol:

My method was to bag everything in small clearly labled sections.
The only problem was i had two people helping me that didn't bother to lable the bags they did. :roll:

Then you don't touch the car for a year or so. Just to make sure you have forgotten completely where everything went. On top of that it is best to move all your stuff around so the bags are all mixed up.

Then take another six months or so off just to make sure you don't have a clue where half the bags even are.

THEN you start putting the car back together. :lol2: Much more fun this way. :thumbsup: :crazy: :bonk:
User avatar
dave-r
Grumpy Old Man
 
Posts: 9842
Joined: 12 Oct 2003 21:45
Location: North of the Tyne, England

Postby blackmagic73 » 23 Jul 2008 17:09

The rear valance isn't real hard to pull, so I'd probably just go ahead and take it off. After that, I got the rear bumper off by undoing the bracket bolts. I had to cut them because they were rusted up so bad. You might be able to get at the bolts holding the bumper to the bracket, but I'm not sure. FYI, if you take off the bumper and bracket together, it weighs a freakin ton.
Got some photos in case they'll help. First one is the backside of the bumper (I need a new one, too...) Second is from underneath looking back at where the bracket bolts come through. It's the two larger holes you can see to either side of the end of the frame rail.
Image
Image
blackmagic73
Frequent Poster
 
Posts: 73
Joined: 28 Feb 2008 1:55
Location: Mobile, AL

Postby blackmagic73 » 23 Jul 2008 17:12

dave-r wrote:My method was to bag everything in small clearly labled sections.
The only problem was i had two people helping me that didn't bother to lable the bags they did. :roll:

Then you don't touch the car for a year or so. Just to make sure you have forgotten completely where everything went. On top of that it is best to move all your stuff around so the bags are all mixed up.

Then take another six months or so off just to make sure you don't have a clue where half the bags even are.

THEN you start putting the car back together. :lol2: Much more fun this way. :thumbsup: :crazy: :bonk:


Now see I used a much easier method. I just put all the bolts in one bucket. Then you know exactly where they all are! :wink:
blackmagic73
Frequent Poster
 
Posts: 73
Joined: 28 Feb 2008 1:55
Location: Mobile, AL

Postby patrick » 24 Jul 2008 5:50

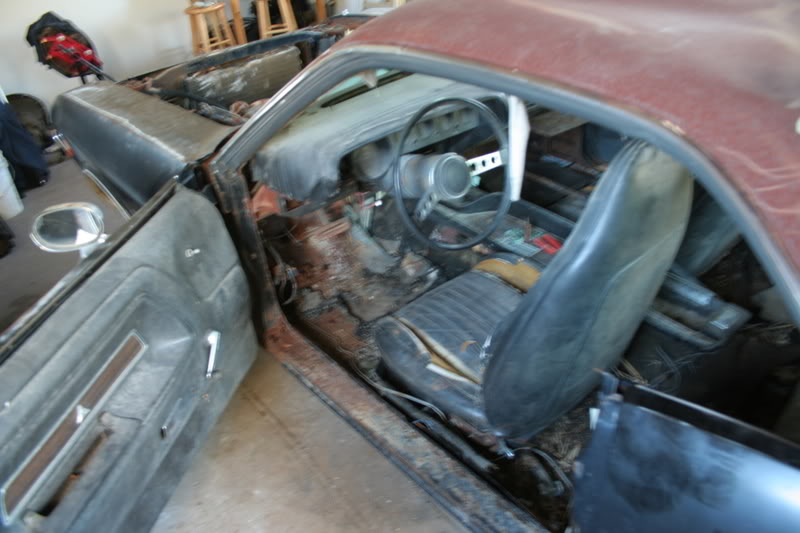
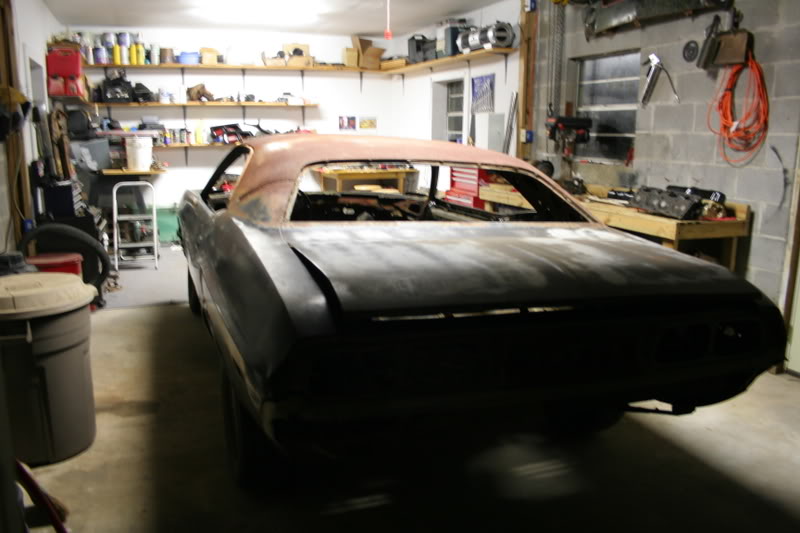
Thank's to both of you for your input. I bagged, and labled, everything, except for the big obvious, piece's. :roll: Only, I did it by myself, then threw them in a bucket. :biggrin: 
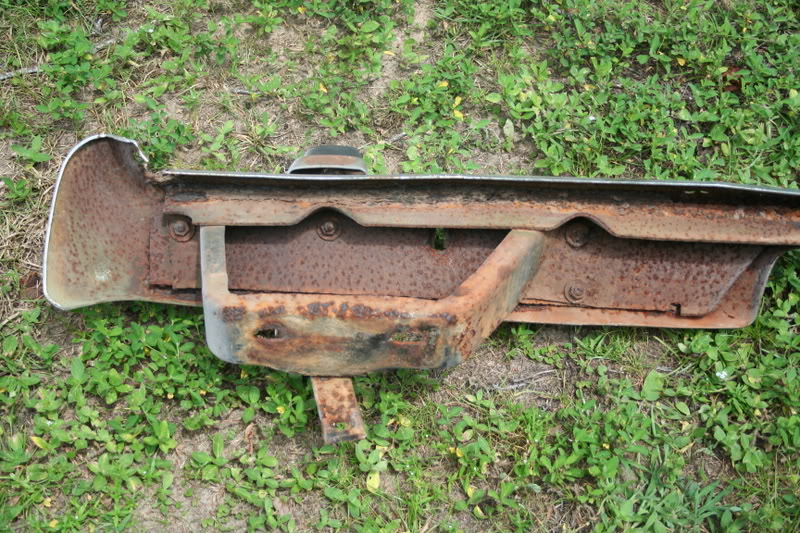
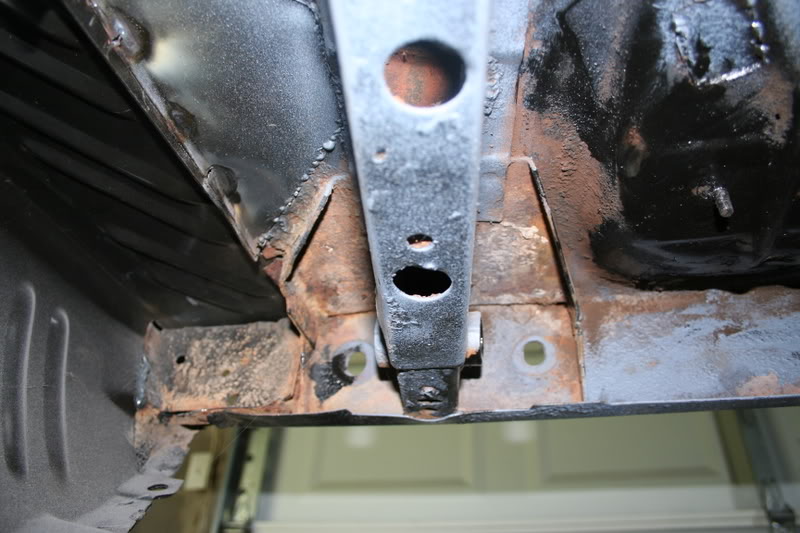
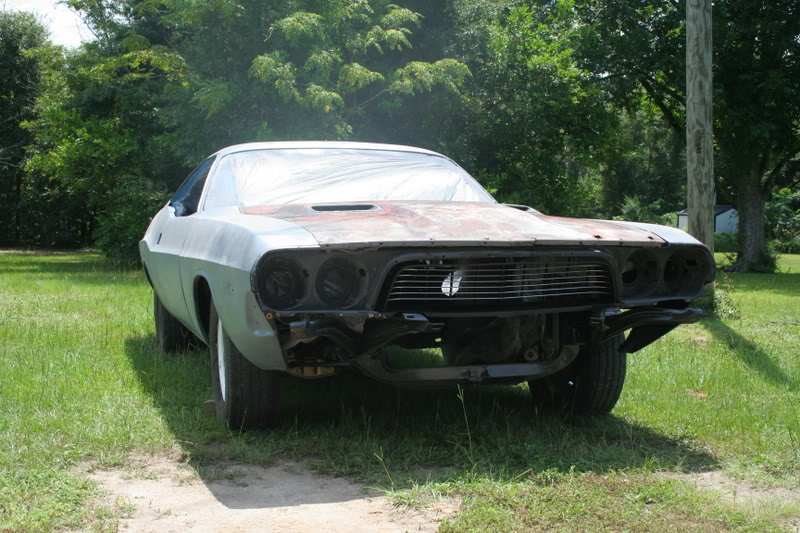
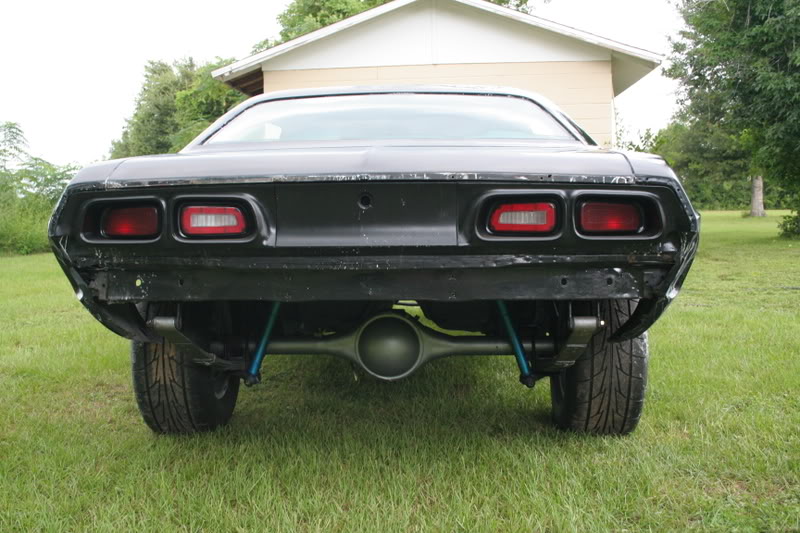
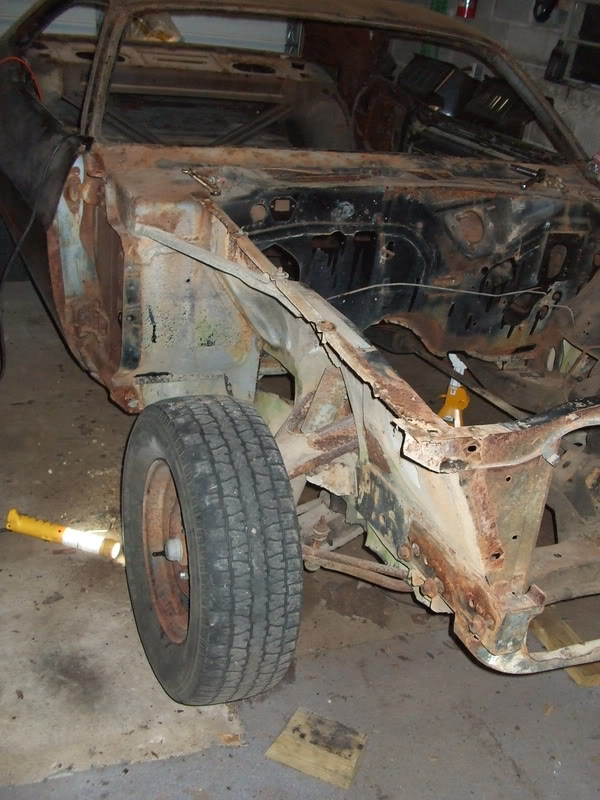
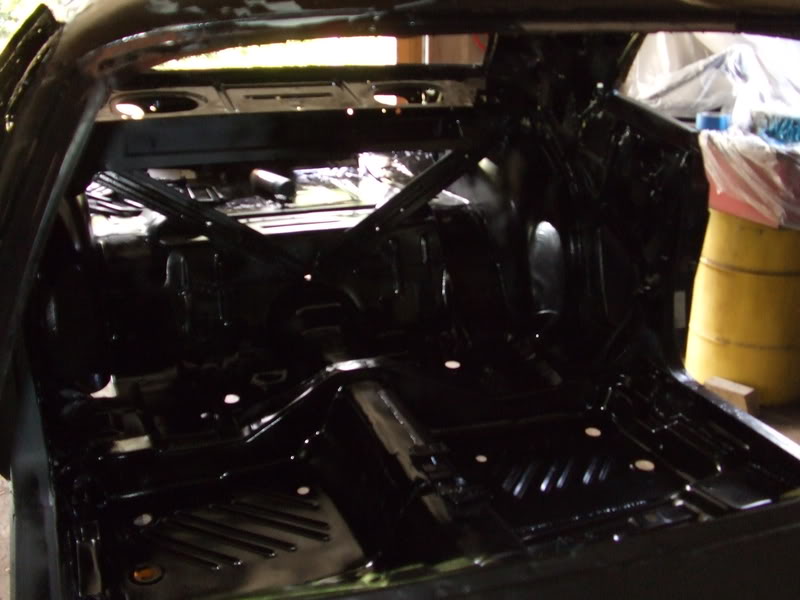
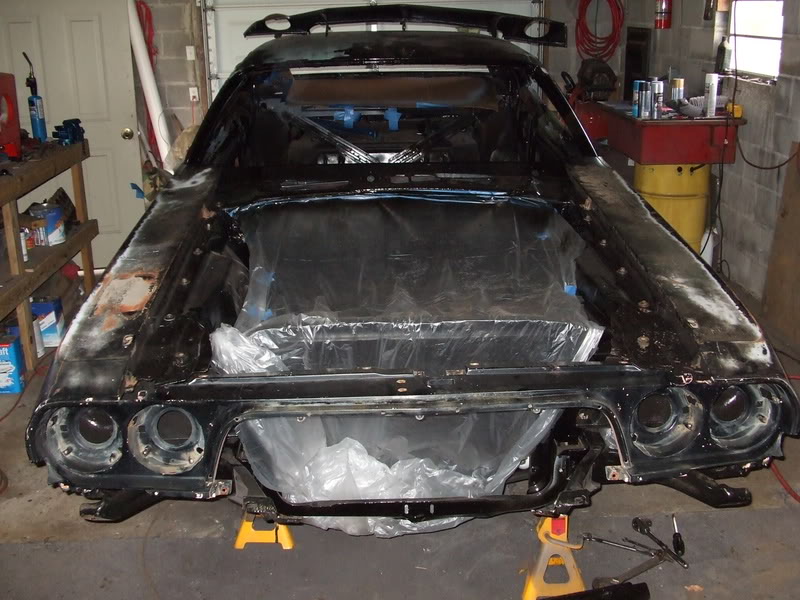
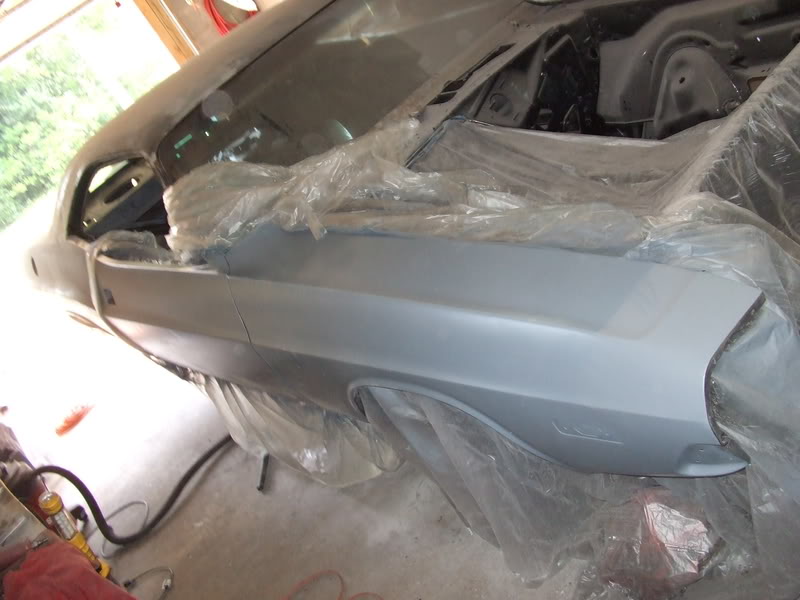
I'm still waiting for the 70', bumper bracket's, I won on ebay,$37.00, about $70.00, with shipping. But, the more I look at the way, Dodge beefed up the 73's. I'm starting to appreciate them. The rubber molding, between the bumper and body are in good shape, just need to be refinished. No Rot! :thumbsup: 
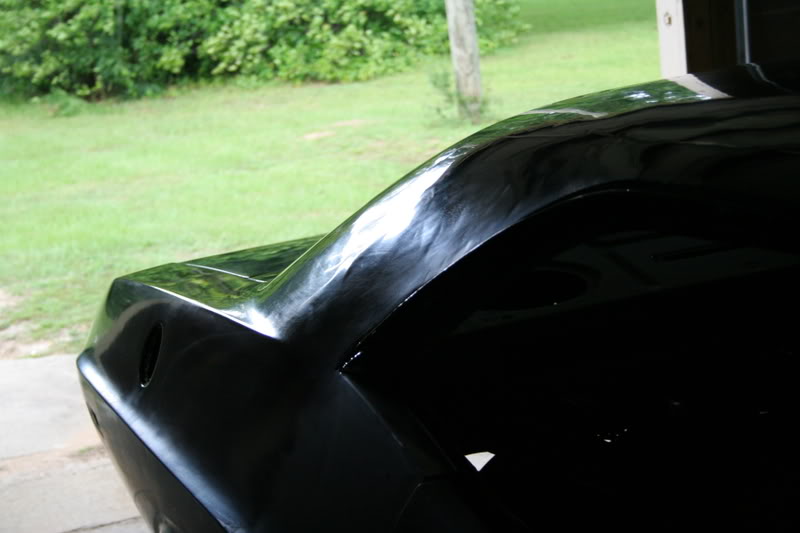
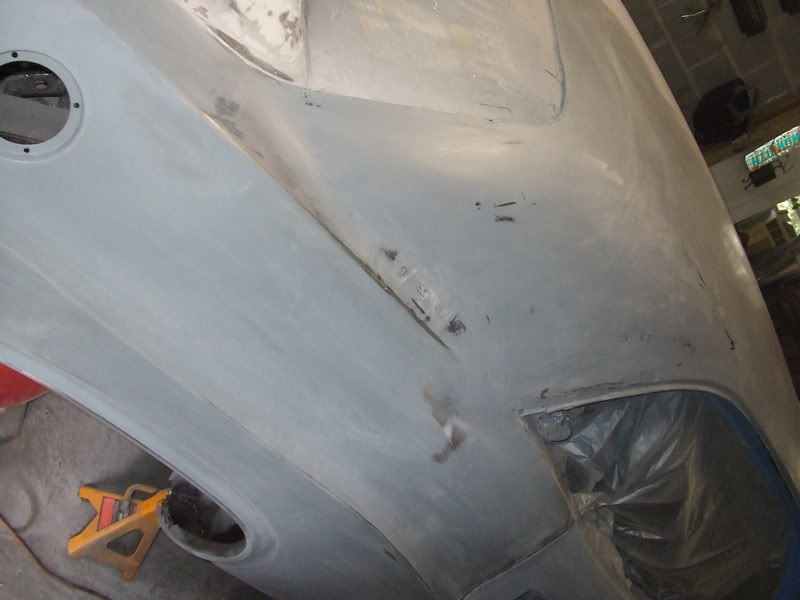
I could tell, that the previous owner was in a hurry, to get the car back together. Paint from the back panel is stuck to the molding. Must have still been tackey, when they put it on. I can refinish that part of the body and, no one, could ever tell. Thank's for the tip on the rear valence. :thumbsup: I thought it might be easier, without it, and you swayed me, the right way. :nod: 
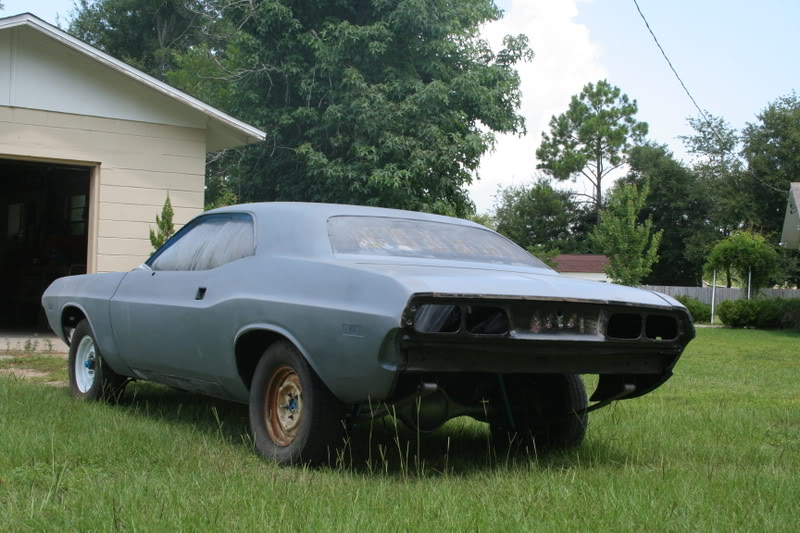
I also like the reinforced steel plate inside the bumper. It's not going to be a racer, so weight isn't an issue. I have that 77' Volare', I'll gut out for that. :twisted: 
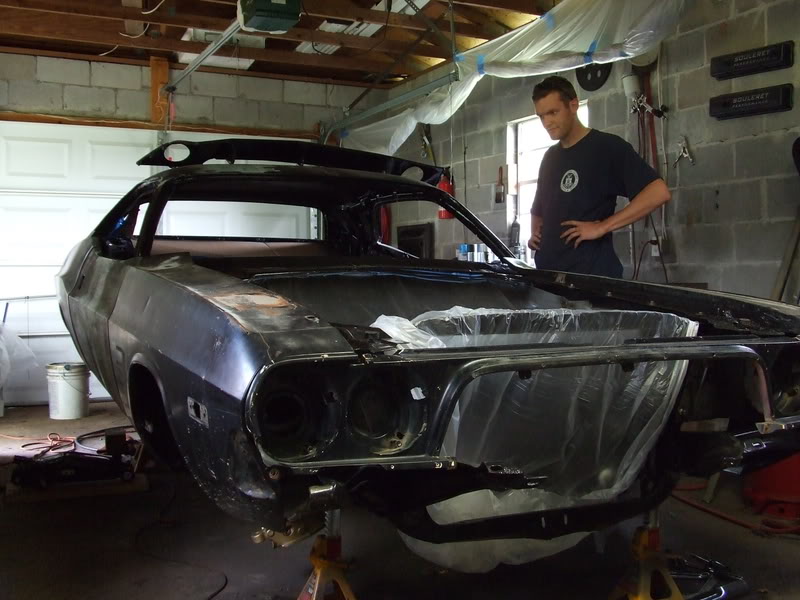
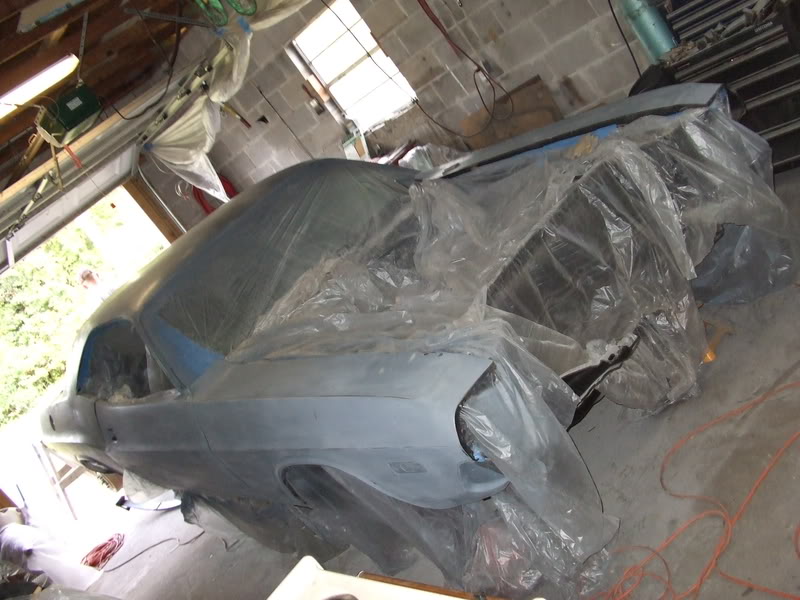
The wife is a little distraut. This past weekend, car was good for show, except, for the bumper's. Now, I have piece's laying all over the garage..., Again!!. Sometime's, women just don't understand. :hmmm:
Thank's again, Guy's!!! :D Patrick
User avatar
patrick
Frequent Poster
 
Posts: 1323
Joined: 09 Jul 2007 0:56
Location: Washington State, U.S.A.

Postby blackmagic73 » 24 Jul 2008 18:31

More progress. The suspension is now on. My new rims (American Racing Vectors, Dukes of Hazzard style) just came in, so I'm dying to get the tires mounted and see what they look like.
This is the first time the car has seen sunlight in months. I'll be painting it this weekend, amidst packing for my move to Texas. She looks so happy sitting on her own four tires (too bad those junk tires I have on there keep going flat...).
Image
Image
Image
Image
Yeah, I know the hood isn't done yet, but I consider that a project unto itself...
blackmagic73
Frequent Poster
 
Posts: 73
Joined: 28 Feb 2008 1:55
Location: Mobile, AL

Postby Dale1035 » 25 Jul 2008 4:36

You have taken on a big job with a car having that much rust. Good luck on your project. I know that you will have something to be very proud of when you are finished.
User avatar
Dale1035
Frequent Poster
 
Posts: 209
Joined: 05 Sep 2006 5:34
Location: Henderson, Ky

Postby blackmagic73 » 25 Jul 2008 5:19

Funny thing is, when I got the car I told myself "aww, the rust isn't that bad....."
blackmagic73
Frequent Poster
 
Posts: 73
Joined: 28 Feb 2008 1:55
Location: Mobile, AL

Postby blackmagic73 » 04 Sep 2008 14:25

Got it painted before I went on leave 3 weeks ago. It came out ok for it being my first time. Can't say I'm entirely happy with it. Didn't block sand as well as I thought, so the roof looks a little wavy. Also had a couple runs here and there in the clear, but I learned a good bit for next time. I figure even if I redo the paint in a couple years, I'll still come out way ahead of sending it to a paint shop.
These pictures were taken while I was buffing it out.
Image
Image
Image
Image
You can see the waviness in that last picture.
Unfortunately, since I got sent to Corpus Christi for advanced flight training, I had to leave the Challenger with my buddy in Florida. Couldn't afford a place like I had up there. I did bring the 318, the hood and the interior so I can work on all that, but I do miss her....
blackmagic73
Frequent Poster
 
Posts: 73
Joined: 28 Feb 2008 1:55
Location: Mobile, AL

Postby Eddie » 04 Sep 2008 14:39

I just finished an 83 Jeep. Did you use any surface sealers? Any skim coat products? We used 3M Waterbourne Paint System because it flows very well and covers a multitude of sins. It filled the slight dips and small valleys and turned out pretty well. Wish I had some pics, it was my first paint 'experience' I suck at painting though, my hands are too steady LOL, I'm used to inspecting small engine parts not spraying away like an artist!LOL :lol: Good Luck in school! :thumbsup:
User avatar
Eddie
Frequent Poster
 
Posts: 6212
Joined: 16 Oct 2006 21:26
Location: Terre Haute, Ind.

Postby blackmagic73 » 04 Sep 2008 15:08

Yeah, I used a primer/sealer, and skimmed filler and spot putty all over. I just rushed a little, I guess. Wanted to get it painted before I left, because I knew if I didn't, it'd be in primer (and likely disassembled) for years. I'd rather have a finished car with a so so paint job than a primered car with perfect bodywork sitting in pieces. And like I said, somewhere down the line I'll give it another try.
blackmagic73
Frequent Poster
 
Posts: 73
Joined: 28 Feb 2008 1:55
Location: Mobile, AL

Postby Eddie » 04 Sep 2008 15:19

blackmagic73 wrote:Yeah, I used a primer/sealer, and skimmed filler and spot putty all over. I just rushed a little, I guess. Wanted to get it painted before I left, because I knew if I didn't, it'd be in primer (and likely disassembled) for years. I'd rather have a finished car with a so so paint job than a primered car with perfect bodywork sitting in pieces. And like I said, somewhere down the line I'll give it another try.
It just needs more time but can be brought back just fine. At least you have learned a lot. I now know why some body shops take a long time. It's very tedious work! And takes a lot of patience as well, at least you are making good progress and it starting to come together! Good Luck :thumbsup:
User avatar
Eddie
Frequent Poster
 
Posts: 6212
Joined: 16 Oct 2006 21:26
Location: Terre Haute, Ind.

Postby botari123 » 05 Sep 2008 23:29

the pros paint there cars twice to get them perfect
just need more time
botari123
Frequent Poster
 
Posts: 106
Joined: 04 Oct 2007 0:56
Location: ontario canada