Page 2 of 6

Posted:
15 Jan 2008 13:54by Eddie
ianandjess wrote:yea that stuff does look cool i have been looking at using the brushed stainless steel they use on kitchen cupboard nowdays my soninlaws father is a cabinet maker so ill have no trouble getting it im not big on wood grain in a muscle car it belongs in luxury cars
cheers ian

Or Sea bearing vessels! My 'new' diesel truck has that wood faux paus dash. I would rather of had that Carbon Composite look which is now being 'phased' in passenger cars and trucks over here. Or Stainless look ect..leave wood to the carpenters!

It's on my R/T's Pistol Grip, The door panels, whew thats enough!

Posted:
17 Jan 2008 9:39by ianandjess
maybe is just an aussie thing but anything with any grunt should be either black or metalic inside
cheers ian

Posted:
17 Jan 2008 13:59by Eddie
ianandjess wrote:maybe is just an aussie thing but anything with any grunt should be either black or metalic inside
cheers ian
I like the aussie way! I dont like the depends under garments for senior citizens way!


Posted:
19 Jan 2008 0:16by 72challengerorange
ianandjess wrote:yea that stuff does look cool i have been looking at using the brushed stainless steel they use on kitchen cupboard nowdays my soninlaws father is a cabinet maker so ill have no trouble getting it im not big on wood grain in a muscle car it belongs in luxury cars
cheers ian
That would looks sweet! Maybe some of the New stainless look stuff. It's much better with fingerprints. They got Stainless wipes as well to clean them up.

Tom

Posted:
19 Jan 2008 5:35by patrick
I kinda like my fake wood grain console center piece.

My wife is into the new car's with all the retro stuff. Even though, she like's the Retro-Look, she melt's at the first sign of some nice looking wood.

What a Great, Wonderful Woman.


Posted:
03 Mar 2008 2:31by 72challengerorange
Making some progress on the engine compartment. Paint came out pretty good for my first try.
Tom

Posted:
03 Mar 2008 2:43by 72challengerorange
Here are some in progress pics.
Tom

Posted:
03 Mar 2008 6:59by ianandjess
looking good


Posted:
03 Mar 2008 11:12by dave-r
Very good progress.


Posted:
03 Mar 2008 12:01by Jimiboy


Nice work! Looks nice & clean...

Posted:
03 Mar 2008 12:23by Eddie
Vey NICE!!


Posted:
05 Mar 2008 3:22by 72challengerorange
Thanks Guys, trying to keep moving.LOL
Tom

Posted:
08 Mar 2008 2:36by 72challengerorange
My wife helped me get the column back in, she makes a good helper. She was a good sport with no complaining while I lined up the coupler and column.LOL
Tom

Posted:
08 Mar 2008 16:15by Eddie
Sweet! That 422 is going to rock your world man!!


Posted:
09 Mar 2008 2:28by 72challengerorange
Rocking my wallet is more like it.

Tom


Posted:
10 Mar 2008 1:25by 72challengerorange
Spent some time fitting stuff up. Coming together slowly.
Tom

Posted:
10 Mar 2008 18:01by bananaskin
ooo looking good


Posted:
10 Mar 2008 22:18by 72challengerorange
bananaskin wrote:ooo looking good

Thanks Banana!
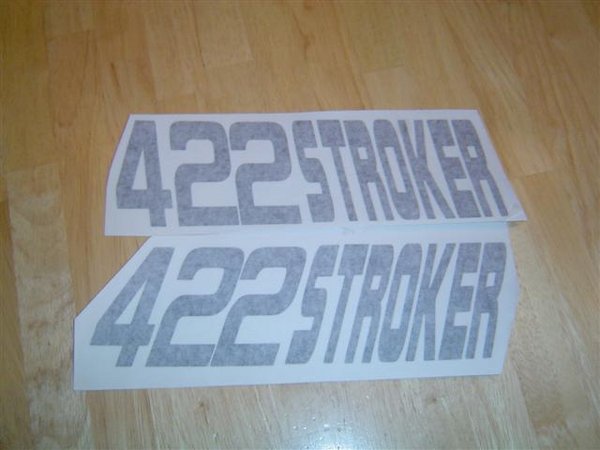
This....
Goes with...
Tom


Posted:
11 Mar 2008 1:05by 72challengerorange
Here is a little info on the build, until it's done.
Tom
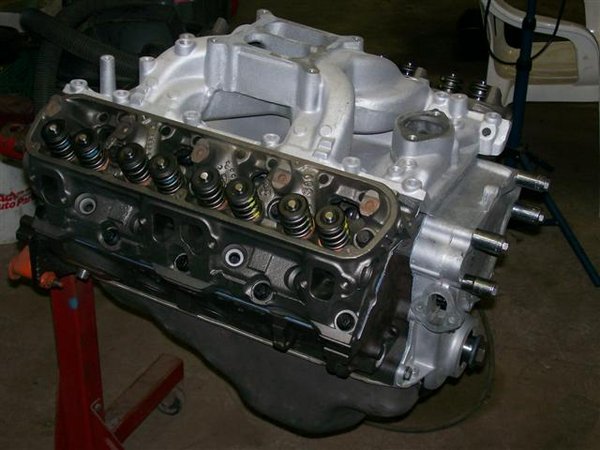
This is a 422, 340+.060 with 4" arm... budget deal..
Scat crank, stock rods w/ARPs all redone, Diamond dished pistons, cam is Crane hydraulic 232@.050 int 242@.050 exh, running ported (by me) 587s with 2.05/1.60 valves. Target is 430ish crank hp, 500tq, all done by 5500. Using the head castings, rods, and block casting, total cost is about $5800 with new Holley 870. That includes breaking in the cam on my stand, basic setting of idle and carb, and swapping in the inner springs. It's built to be a cam swap and heads away from more serious power.

Posted:
11 Mar 2008 4:55by patrick
Looking real good, Tom. I'm watching your post's. As you know, I also have a 340. And BIG Dream's. 430ish, H.P. sound's awesome. I believe mine's putting out 300+ but, not sure. It would be nice to putt it on a dyno. Keep up the good work.

Pat

Posted:
11 Mar 2008 13:13by Eddie
Very nice build Tom. I like the idea of a bigger valve to help low speed flow. Strong bottom end, I bet it exceeds all your expectations and produces a lotta grunt


Posted:
12 Mar 2008 2:13by 72challengerorange
Thanks guys, It will suit my needs.LOL For street driving and that is mostly what I plan, the TQ down low should be perfect!
Tom


Posted:
16 Mar 2008 20:59by 72challengerorange
Black it is for the gasket!
Worked on wiring harness's today. The PO painted everything black, I mean everything.lol I got most of it off with some prep-sol and elbow grease. My hands are sore. Tossed in the MP Voltage regulator much nicer looking than the silver one i had in there before. Added a missing ground strap with it too. ballast resistor is a bit different from stock looking but will function ok. The old one was toasted. Tossed in a few of the clips/loops leaving the loops loose for now until all the wiring has been finished.
Threw an old battery in to mock up the Batt cables and hold-down stuff.
Got the new relays for the H/beam L/beam and fog lamps mounted under the tray, still need to wire them up and mount a distribution block under there neatly too. I used a piece of Glav flat stock for the relays and reused an existing hole for the bracket spacing it off the rad support to clear the mounting screws.
Tom

Posted:
17 Mar 2008 9:23by Jimiboy
Excuse my unknowledge,

but i am curios about that box on the drivers side fender at the radiator, what is that really?
/Jim

Posted:
18 Mar 2008 0:18by 72challengerorange
Jimiboy, It is an Electtronic Ignition box. I was going to put the MP conversion kit it, but I wanted a Rev limiter for the engine and this has one built in. Partner this up with a Electronic Distributor and it's good to go. My car had Points Ignition before and I was looking for something a bit more reliable. Hopefully this will work good.LOL
Tom
This is Summit racings box, from all accounts made by Mallory.

Posted:
18 Mar 2008 8:29by Jimiboy
Okey, then i understand. I thought it looked like an ignition box, but when it was placed there i thought it maybe is something else..
Can this box be a step better then mopars electronic ignition if i need more reability on higher rpm?

Posted:
19 Mar 2008 1:44by 72challengerorange
Jimiboy wrote:Okey, then i understand. I thought it looked like an ignition box, but when it was placed there i thought it maybe is something else..
Can this box be a step better then mopars electronic ignition if i need more reability on higher rpm?
Not sure on the reliabilty as the MP stuff is usually pretty good. But You would gain a Rev limiter to protect your engine on missed shifts. Also multiple sparks up to 3000rpm for cleaner idle and throttle response. At least thats what the ads say.LOL
Tom

I was just hiding the box a bit to keep the firewall a bit stock looking.


Posted:
19 Mar 2008 8:24by Jimiboy
I think the rev limiter is a very good thing to have

I can understand your idea with the stock look, it sure looks sweet without that box on the torped


Posted:
23 Mar 2008 1:49by 72challengerorange
Wiring is done, ready for Engine and tranny now.
Tom

Posted:
23 Mar 2008 16:33by Eddie
Very nice work on the electronics Tom!

 Or Sea bearing vessels! My 'new' diesel truck has that wood faux paus dash. I would rather of had that Carbon Composite look which is now being 'phased' in passenger cars and trucks over here. Or Stainless look ect..leave wood to the carpenters!
  What a Great, Wonderful Woman.


 but i am curios about that box on the drivers side fender at the radiator, what is that really?