Postby dave-r » 12 Jul 2007 17:51

Here is some work I did very recently.

Finished the fuel and oil lines. Just waiting on the fuel sender unit.

The oil cooler lines will only be visible in that opening between the front valance and bumper. The bits behind the grille will be blacked out. I don't want anything showing through the grille.

The fuel pressure regulator is angled as the hood was catching it. :roll:

IMG_1442.jpg
IMG_1445.jpg
IMG_1448.jpg
IMG_1449.jpg
IMG_1450.jpg
User avatar
dave-r
Grumpy Old Man
 
Posts: 9842
Joined: 12 Oct 2003 21:45
Location: North of the Tyne, England

Postby dave-r » 12 Jul 2007 17:53

Fitted the boot lid and rear spoiler.

I had to remove this as someone let all the washers for the spoiler fall inside the skin. The same person lost the special nuts for the spoiler and seems to have ripped one of the end fixings out at each end. This means the spoiler no longer sits as tight to the boot as it did but it is not far off.

IMG_1455.jpg
IMG_1456.jpg
User avatar
dave-r
Grumpy Old Man
 
Posts: 9842
Joined: 12 Oct 2003 21:45
Location: North of the Tyne, England

Postby Eddie » 12 Jul 2007 18:32

That buttshot of your car Dave makes me wish I would have kept the original Chrysler Duckbill spoiler that was "haphazardly" attached to my car, on it! It just looks so natural! It wasn't on the buildsheet though so I decided to omit it. :s022:
User avatar
Eddie
Frequent Poster
 
Posts: 6212
Joined: 16 Oct 2006 21:26
Location: Terre Haute, Ind.

Postby dave-r » 12 Jul 2007 19:58

They were available to fit over your MoParts counter as accessories after the T/A came out. So an owner could have fitted one in 1970/71.
User avatar
dave-r
Grumpy Old Man
 
Posts: 9842
Joined: 12 Oct 2003 21:45
Location: North of the Tyne, England

Postby Phase4 » 13 Jul 2007 7:50

dave-r wrote:Looking good from the front though. :D


No vinyl roof ??? :shock: Image :wink:

All the best
Phase4
Board Regular
 
Posts: 36
Joined: 23 Oct 2003 17:21

Postby dave-r » 13 Jul 2007 8:27

Phase4 wrote:No vinyl roof ???


Not yet. Still in it's wrapper. :wink:
User avatar
dave-r
Grumpy Old Man
 
Posts: 9842
Joined: 12 Oct 2003 21:45
Location: North of the Tyne, England

Postby dave-r » 08 Aug 2007 16:36

I finally painted that home made air filter lid. I still need to take a few mm off the top of the intake for it to clear the hood completely.

Also fitted a torque strap. These Schumacker pieces look a lot better than the old chain I had on there before. :)

IMG_1585.jpg
IMG_1582.jpg
IMG_1581.jpg
User avatar
dave-r
Grumpy Old Man
 
Posts: 9842
Joined: 12 Oct 2003 21:45
Location: North of the Tyne, England

Postby dave-r » 19 Jan 2008 19:30

I woke up this morning feeling pretty good so I decided to see if working on the car again was possible without making me more ill.

So I decided to take the dash and wiring loom out.

The last time I had the windscreen out (some years ago now) I welded up the rotten bits at the bottom edge of the windscreen. But I left the dash in place and had a little fire as a result..... :oops:

So with the dry powder from the fire extinguisher and all the paint and filler dust from the new paint job it is pretty mucky under and in the dash.

First job is to clean up and paint all the bulkhead metalwork. Then pull the dash completely apart for cleaning before re-installing it.

I have to fit the new "Painless" wiring harness at the same time so need to plan that all out too.

IMG_1920.jpg
My body guy was cheap but messy.
IMG_1921.jpg
Lots of corrosion in the vents.
IMG_1927.jpg
I had this out and all cleaned up a few years ago. Look at it now!
IMG_1929.jpg
I am thinking wire brush to start with?
IMG_1931.jpg
I had better not throw any of this out as i will need some of the bits i am sure.
User avatar
dave-r
Grumpy Old Man
 
Posts: 9842
Joined: 12 Oct 2003 21:45
Location: North of the Tyne, England

Postby Eddie » 19 Jan 2008 20:33

Good to see your back at it Dave. have you thought aboot the conversion self etching products like Por-15 Metal ready or other rust conversion chemicals? I did the bottom of my R/T this way and it turned out pretty good against surface rust. It took 30 minutes then clean with water and ready for paint or metal work. Of course MCR blasted my work off and re-did it :s009:
User avatar
Eddie
Frequent Poster
 
Posts: 6212
Joined: 16 Oct 2006 21:26
Location: Terre Haute, Ind.

Postby dave-r » 19 Jan 2008 21:44

I will be using a wire brush on a drill to get the thick of it off and then a rust converter I have used with great results on other parts of the car. Then I will spray or brush on some heavy paint. Non of it is visible so it does not matter what it looks like but I will use black so it blends into the carpet. :thumbsup:
Last edited by dave-r on 20 Jan 2008 9:28, edited 1 time in total.
User avatar
dave-r
Grumpy Old Man
 
Posts: 9842
Joined: 12 Oct 2003 21:45
Location: North of the Tyne, England

Postby dave-r » 20 Jan 2008 18:26

That will do.

IMG_1942.jpg
User avatar
dave-r
Grumpy Old Man
 
Posts: 9842
Joined: 12 Oct 2003 21:45
Location: North of the Tyne, England

Postby ianandjess » 21 Jan 2008 10:29

dave let us know how you go with the wiring i had electrical stuff but ill have to do some thats for sure if a full replacement is easy enough it may be a better option for me to
cheers ian
User avatar
ianandjess
Frequent Poster
 
Posts: 687
Joined: 10 Dec 2005 12:18
Location: australia

Postby dave-r » 21 Jan 2008 11:18

I will do a detailed step by step report as it happens. Including the swearing and mistakes. :lol:

The wiring will be done in stages actually. I will be mounting the fuse box and harness first. Maybe wire up the dash and interior. Then the rear lights. The front end will be more complicated and may take some time to complete as the front fenders are not on yet.
User avatar
dave-r
Grumpy Old Man
 
Posts: 9842
Joined: 12 Oct 2003 21:45
Location: North of the Tyne, England

Postby patrick » 22 Jan 2008 5:38

You are very brave, Dave. And very knowledgeable too. When I see all that wiring, it look's like spaggetti to me. I farm a job like that out to the Pro's. And I'm not one, especially with the wiring. Keep us posted on your awesome progress. :thumbsup: Patrick
User avatar
patrick
Frequent Poster
 
Posts: 1323
Joined: 09 Jul 2007 0:56
Location: Washington State, U.S.A.

Postby dave-r » 22 Jan 2008 10:12

patrick wrote:You are very brave, Dave. And very knowledgeable too.


Don't know about that. Stupid maybe. The wiring looks like spaghetti to me too. :lol:

I don't have a clue about how any of this is going together. I can't even remember what half the bits off the car are or where they go any more. :roll:

I will probably muddle through somehow though. I usually do. :wink:

I fitted the MSD unit in the engine bay last night because I have to think about how to incorporate those wires too.

But then I suddenly remembered I haven't done the brake system yet and I would be better off doing that first so I think I will sort that out before the wiring goes in. I might need access to the brake master cylinder pushrod and that will be easier while the dash is out.

I really ought to organise the logistics of this better. :D
User avatar
dave-r
Grumpy Old Man
 
Posts: 9842
Joined: 12 Oct 2003 21:45
Location: North of the Tyne, England

Postby dave-r » 03 Feb 2008 18:25

Not been that well lately and when me head is OK I have had a bad back! :cry:

But managed to fit the brake system this afternoon.

That is a new Strange Engineering master cylinder (slightly smaller bore than my old lightweight MP unit) which needs to come off again for bench bleeding now I have sorted out the brake lines.

The electric line lock used to reside on the inner fender. I have now mounted it on an ally plate where the bulkhead connector used to be.

IMG_1957.jpg
User avatar
dave-r
Grumpy Old Man
 
Posts: 9842
Joined: 12 Oct 2003 21:45
Location: North of the Tyne, England

Postby christer » 03 Feb 2008 22:41

dave-r wrote:That is a new Strange Engineering master cylinder (slightly smaller bore than my old lightweight MP unit)


Why did you do this swap? Just wondering... Nice installation.
christer
Ghost 48
 
Posts: 2133
Joined: 13 Oct 2006 19:52
Location: Sweden

Postby dave-r » 04 Feb 2008 9:28

christer wrote:
dave-r wrote:That is a new Strange Engineering master cylinder (slightly smaller bore than my old lightweight MP unit)


Why did you do this swap? Just wondering... Nice installation.


I wanted slightly less pedal effort. The smaller the bore of the master cylinder, the easier it is to apply the brakes and the more pressure you can apply.
User avatar
dave-r
Grumpy Old Man
 
Posts: 9842
Joined: 12 Oct 2003 21:45
Location: North of the Tyne, England

Postby dave-r » 06 Feb 2008 8:42

Had an hour tonight before pancake making duties so decided to set the front wheel alignment.

I started off by getting the car as level as possible. Also resting on the LCAs at about ride height.

I set the UCA bushings full in at the rear each side and full out front in order to set max positive caster.

Checking each brake disc with a plumb-bob I could see that each disc was very slightly positive camber by the same amount each side. This confirmed my spirit level readings for the car to be correct.

I then wound in each front UCA bush very slightly to get zero camber on the plumb-bob.

I then zeroed a magnetic camber gauge on one disc at a time and wound in the front UCA bushing inboard some more to give 0.5 degrees negative camber.

Dialing in the front UCA bush also decreases the positive caster.

Looking at the adjustment cams on the inner fenders when i had finished they look to be set exactly the same each side so I think i have it right.

I would normally put a bit more negative camber in but have decided to go for slightly more caster this time and see how it goes.

img_1958_100.jpg
img_1959_436.jpg
img_1960_657.jpg
User avatar
dave-r
Grumpy Old Man
 
Posts: 9842
Joined: 12 Oct 2003 21:45
Location: North of the Tyne, England

Postby Jon » 09 Feb 2008 4:33

Dave, are you using offset UCA bushings? I have a set and need to figure which way to position them for maximum caster.

When the local shop did an alignment with the standard bushings recently I asked for max positive Caster, but only got 1 degree while sacrificing to camber, +1.

On a single lane, center crown road, the car tracks well until veering off center then it wants to dart off that low side. /^\

What do you think about negative 1/2 camber to fix this. Will that wear the out side of the tire to much? :)
User avatar
Jon
Frequent Poster
 
Posts: 1229
Joined: 21 Aug 2005 15:12
Location: Medford Oregon

Postby dave-r » 09 Feb 2008 11:16

I don't have offset UCA bushings. But then I don't want a lot of caster because I have such wide front wheels and quick ratio manual steering. I saw a diagram of how they fit somewhere. i will try to find it.

I don't know what the caster has ended up at on mine but I can see it must still have a little. I don't want to work out what the caster is otherwise I might not be happy and decide to do something about it. :lol:

I do know that it has been set up by two professional places in the past and neither has done it right. the last time it was obvious that I had different caster and camber on each side.

For Drag Racing you probably want zero camber and zero (or very little) toe-in with as much caster as possible. If most of your driving is on long straight roads you also want something like that.

On a circuit with lots of high speed tight corners you want lots of negative camber and some toe-OUT to make cornering easier. A lot of caster is not needed.

So for driving on the winding public roads we need to find a setting somewhere in-between.

Now the last time I did this I was aiming for just under 1 degree negative camber. This made corning better (in particular with a heavy 440 up front) and also made steering easier due to the lack of much caster.

So this time I decided just to try a half degree negative camber which gives me a little more caster angle. I am starting to think that a half degree is probably enough for most of my driving. But I personally would not like less than that on UK roads.

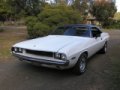
But, as you can see from the photos, the front bushings are only about 1/8th of a turn out from fully in (the rears are fully in) so there can be very little caster even with only a half a degree camber. But i don't think you need as much as some people say. After all. these cars came from the factory with little of no caster angle. Some manual steered cars even came with some negative caster instead of positive.

I'm not going to worry about it. I will just see how it drives.
User avatar
dave-r
Grumpy Old Man
 
Posts: 9842
Joined: 12 Oct 2003 21:45
Location: North of the Tyne, England

Postby dave-r » 09 Feb 2008 11:27

This is how you want offset bushings to fit.

The pic is the front of the control arm - arrows go pointing out at the front.

That may be opposite to the instructions since the bushings were originally made to try to correct a twisted chassis problem. You are are trying to get more castor with them.

More info;
http://hometown.aol.com/pwall5/cars/tips.html

3147226-offsetbushingsFINAL.jpg
User avatar
dave-r
Grumpy Old Man
 
Posts: 9842
Joined: 12 Oct 2003 21:45
Location: North of the Tyne, England

Postby dave-r » 12 Feb 2008 11:36

Well I still have not started on the electrics.

I realised I was getting ahead of myself after I removed the headliner and found it was pretty rotten under there. So I need to sort that out before I put any wiring in.

I use a pretty good epoxy rust converter (which I now need more of) and I think once that has done its stuff I will spray "rust off" wax all over the lot and in every cavity to seal it for good.

IMG_1965.jpg
IMG_1966.jpg
User avatar
dave-r
Grumpy Old Man
 
Posts: 9842
Joined: 12 Oct 2003 21:45
Location: North of the Tyne, England

Postby Eddie » 12 Feb 2008 22:15

I bet it looks worse than it is. Body work isnt my bag but I think it will look good as new once you're done with it Dave.
User avatar
Eddie
Frequent Poster
 
Posts: 6212
Joined: 16 Oct 2006 21:26
Location: Terre Haute, Ind.

Postby dave-r » 13 Feb 2008 21:24

It did look worse than it is. :thumbsup:

It was just a light surface rust that came straight off with a wire brush. No pitting or anything.

What i thought was bad rust and pitting was actually the remains of some adhesive that had been used to glue some wool type stuff to the roof before the headliner went in?

I spayed it all with the rust converter anyway so that it is sealed against any further damp in the future. I will cover that with a layer of the cavity wax just to be sure and to act as a slight sound deadener. I will not be replacing whatever that wool stuff was.
User avatar
dave-r
Grumpy Old Man
 
Posts: 9842
Joined: 12 Oct 2003 21:45
Location: North of the Tyne, England

Postby Eddie » 13 Feb 2008 22:03

Glad to hear it Dave.
User avatar
Eddie
Frequent Poster
 
Posts: 6212
Joined: 16 Oct 2006 21:26
Location: Terre Haute, Ind.

Postby dave-r » 16 Feb 2008 16:15

The flash on the camera made it look worse too.

But never mind. Here is the finished result.

IMG_1974.jpg
IMG_1975.jpg
User avatar
dave-r
Grumpy Old Man
 
Posts: 9842
Joined: 12 Oct 2003 21:45
Location: North of the Tyne, England

Postby Eddie » 16 Feb 2008 19:47

Huge difference. Looks great! Is this the 'wax' substance you are talking about? Is it a preservative/sealer?
User avatar
Eddie
Frequent Poster
 
Posts: 6212
Joined: 16 Oct 2006 21:26
Location: Terre Haute, Ind.

Postby dave-r » 16 Feb 2008 21:47

The wax is a type of non-setting underseal for use in cavities. It is a transucent brown in colour. It seals against oxygen and repels moisture.

But under that is a clear epoxy spray that converts rust to an inert back oxide and also seals the surface away from moisture and oxygen. This finish can be painted dorectly onto or a lighter primer can be applied if using a light coloured top coat.
No need for a top coat here though as it is all hidden inder the headliner.

It might be a mistake to use the wax on the roof panel. I might get into a bit of a mess putting the headliner up. It washes off easily enough with white spirit though.
User avatar
dave-r
Grumpy Old Man
 
Posts: 9842
Joined: 12 Oct 2003 21:45
Location: North of the Tyne, England

Postby dave-r » 01 Mar 2008 22:35

Oh well. The vinyl top is now on.

Not as hard as I thought it would be actually.

But a hell of a lot more hard work than I expected. About 3 hours work in total. But I had to take a couple of rest breaks. Man it was heavy work. Made more painful by getting the hairs on my arms glued to the roof a few times. :lol:

The trim in the photos is not screwed down. Just pushed on to hold the edges.

One bit of DISASTER though. The body paint has melted on a spot where I accidentally overshot some of the spray adhesive. I was holding the spray can very close to spray up the bottom edge and the solvent in the spray must react to the paint.

Don't know what i am going to do about that. It was all going so well as well. :(

IMG_2009.jpg
IMG_2010.jpg
IMG_2012.jpg
IMG_2015.jpg
IMG_2016.jpg
IMG_2019.jpg
IMG_2020.jpg
User avatar
dave-r
Grumpy Old Man
 
Posts: 9842
Joined: 12 Oct 2003 21:45
Location: North of the Tyne, England