-

dave-r - Grumpy Old Man
- Posts: 9842
- Joined: 12 Oct 2003 21:45
- Location: North of the Tyne, England
-
Jon - Frequent Poster
- Posts: 1229
- Joined: 21 Aug 2005 15:12
- Location: Medford Oregon
-

jh27n0b - Frequent Poster
- Posts: 389
- Joined: 02 Apr 2006 12:05
- Location: Indiana
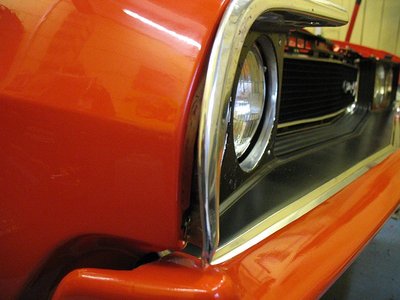
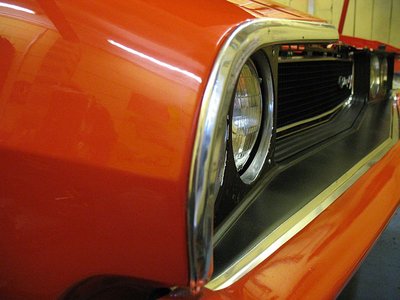
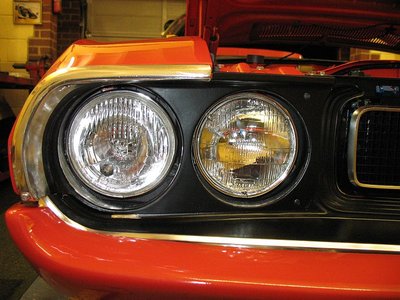
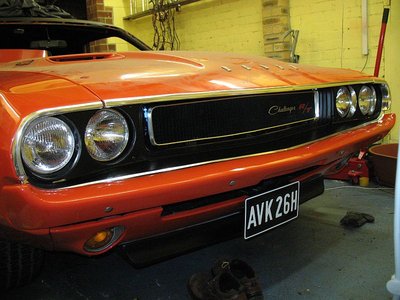
Have had a bit of bother with one of the headlight bezels this weekend.
The passenger side has taken a couple of hits over the years. Not by me I might add.
It was professionally repaired and didn't look too bad but my body man that re-sprayed the whole car did a nice job of making the fender as good as possible and did a much better job than the repair lot had done.
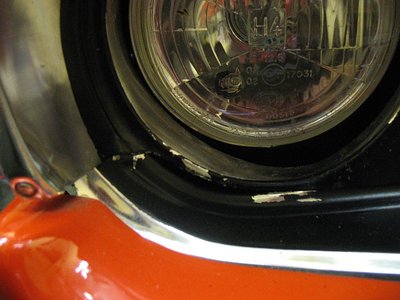
However. Now I have come to fit the headlight bezel, the amount of damage done to it has been made a lot more obvious.
See photo.
-

dave-r - Grumpy Old Man
- Posts: 9842
- Joined: 12 Oct 2003 21:45
- Location: North of the Tyne, England
-

dave-r - Grumpy Old Man
- Posts: 9842
- Joined: 12 Oct 2003 21:45
- Location: North of the Tyne, England
-

dave-r - Grumpy Old Man
- Posts: 9842
- Joined: 12 Oct 2003 21:45
- Location: North of the Tyne, England
I have tried working them but with little success. I got it slightly better but not much.
The sheet metal screw in the front corner pulled though as well so I have had to put a much larger (and ugly) screw in there for now. I should be able to repair it enough to get a smaller screw in there.
I also ran out of paint so have not touched up the scratches yet.
The sheet metal screw in the front corner pulled though as well so I have had to put a much larger (and ugly) screw in there for now. I should be able to repair it enough to get a smaller screw in there.
I also ran out of paint so have not touched up the scratches yet.
-

dave-r - Grumpy Old Man
- Posts: 9842
- Joined: 12 Oct 2003 21:45
- Location: North of the Tyne, England
Looks very good Dave, for the amount that it was distorted.
Mine was the same way, both headlight buckets were badly misshapen and I spent several days trying to get everything to line up, to no avail. Everything was spring-loaded in my grille, as a result. Take one screw off and POW, it all pops out!
Mine was the same way, both headlight buckets were badly misshapen and I spent several days trying to get everything to line up, to no avail. Everything was spring-loaded in my grille, as a result. Take one screw off and POW, it all pops out!
- Moparman1972
- Frequent Poster
- Posts: 538
- Joined: 29 Apr 2006 17:10
- Location: Connecticut
from the cars i have seen since i was young and remember my brothers cars and his friends cars they came that way from the factory , none of that stuff fit very well at all, yours looks ALOT better than most dave i know its an important detail but that stuff just doesnt match up very well 

-

drewcrane - Frequent Poster
- Posts: 2893
- Joined: 01 Sep 2007 12:36
- Location: "follow the laraya belt ,that should get ya there"
-

ianandjess - Frequent Poster
- Posts: 687
- Joined: 10 Dec 2005 12:18
- Location: australia
- Moparman1972
- Frequent Poster
- Posts: 538
- Joined: 29 Apr 2006 17:10
- Location: Connecticut
OK I am back to working on the car again. Had a death in the family so the car had to take a back seat for a while.
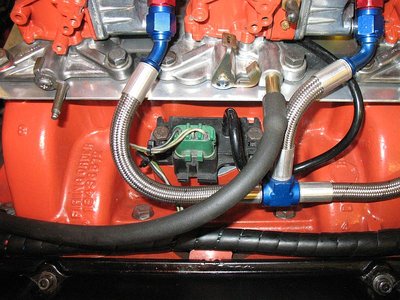
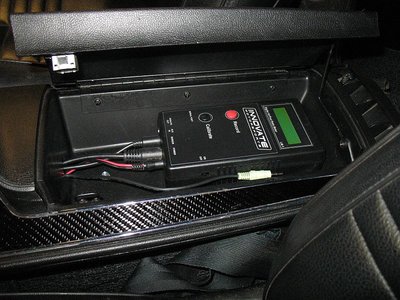
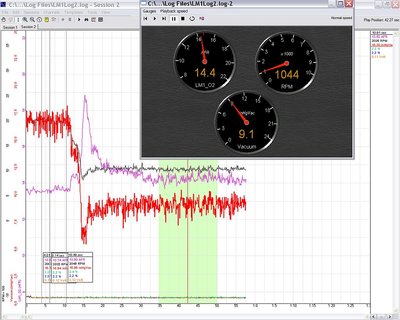
I had a go at some data acquisition this afternoon. Not sure if I believe the vacuum reading or not. I will have to check it against a normal vacuum gauge. It is about twice what i used to have with the old cam.
RPM is around 1000 at idle. I would like to loose about 50-100rpm if possible. So I will need to make the holes in the throttle blades a touch smaller than they needed to be with the old hydraulic cam.
Got 16 degrees initial and 36 total advance at the moment. So a little work to be done on the distributor curve before I start messing with the carbs.
Last edited by dave-r on 22 Mar 2009 17:21, edited 1 time in total.
-

dave-r - Grumpy Old Man
- Posts: 9842
- Joined: 12 Oct 2003 21:45
- Location: North of the Tyne, England
I like that display and workmanship of the MAP sensor fab in the chokewell. Nice work! Dave can you take a reading of the MAP with ignition key on and engine off? It should mirror the barometric pressure or ambient pressure exactly. When the idle is lowered to an acceptable level,(900 or so), the pressure will be even higher. I see this is the average over 3 runs with about 20 seconds of run time totaled for all 3,,overlayed for an average. After your tuning adjustments I would like to see another with a longer run time at least till you get to operating temps. Then when you get the car on the road the "under load" readings will be interesting,,, I gotta get one setup,, like you have. I'll wait till you get the R&D done.  Oh and another thing I thought of,, you did plug any existing vacum ports if you have any left that is, and the hose isnt collapsing and fits tight around the nipples on both ends.(I know you thought of all this just thinking out loud)
-

Eddie - Frequent Poster
- Posts: 6212
- Joined: 16 Oct 2006 21:26
- Location: Terre Haute, Ind.
I will do what you suggest about getting a zero reading.
I had also better check I have the voltage scale the right way around in the program.
Oh and I warmed it up first before starting the recording. I just had it at 2000rpm to calibrate the rpm readings.
I had also better check I have the voltage scale the right way around in the program.
Oh and I warmed it up first before starting the recording.
-

dave-r - Grumpy Old Man
- Posts: 9842
- Joined: 12 Oct 2003 21:45
- Location: North of the Tyne, England
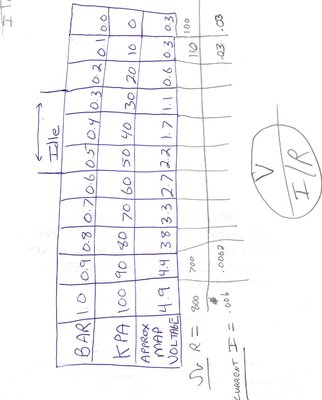
Good. I'll wait and see what you're findings are on the ' calibration ' and the voltage scale and the mechanical pressure reading. I may have an answer to the "pressure differential" but I need to know the "baseline or zero". I am thinking pressure differential minus ambient= mechanical pressure, because the MAP measures pressure diff not actual barometric pressure, so when the vacum reduces in the intake as the throttle is opened it can skew the results. But this is a wildass assumption, we'll wait till you test further. I really enjoy this part!!  Here is a voltage baro chart from the MAP sensor, I cant remember if I sent this to you or not.
 Here is a voltage baro chart from the MAP sensor, I cant remember if I sent this to you or not.
-

Eddie - Frequent Poster
- Posts: 6212
- Joined: 16 Oct 2006 21:26
- Location: Terre Haute, Ind.
I also noticed your voltage didnt change that much from .12 Volts on the 'overlay',,there should have been a longer waveform on the voltage when you increased/decreased the throttle opening. It should mirror the vacum difference, but voltage output is inversely proportional to throttle opening. More throttle=less voltage because the vacum drops.
-

Eddie - Frequent Poster
- Posts: 6212
- Joined: 16 Oct 2006 21:26
- Location: Terre Haute, Ind.
airfuelEddie wrote:I also noticed your voltage didnt change that much from .12 Volts on the 'overlay',,there should have been a longer waveform on the voltage when you increased/decreased the throttle opening. It should mirror the vacum difference, but voltage output is inversely proportional to throttle opening. More throttle=less voltage because the vacum drops.
No no no. Those lines are the unused inputs. I should have deleted those from the view. The manifold vacuum is the RED line. You can see it changes with throttle by the rpm line (black).
-

dave-r - Grumpy Old Man
- Posts: 9842
- Joined: 12 Oct 2003 21:45
- Location: North of the Tyne, England
Rest assured they are just unused traces I should have removed from the view. 
Not much time on the car tonight. Had to make dinner and then had a blazing row with the wife for good measure.
What i did get done was increase the advance stop bush diameter in the MSD distributor to give me about 3 degrees less timing so I can add a bit more initial.
The next thing to do is epoxy shut a couple of air holes on the outer carbs to bring the rpm down a bit. Then I will fire her up and do another recording. With and without the Map sensor pipe connected (to get that base line Eddie ) and I will fit the mechanical vacuum gauge while the MAP sensor is not there to see if they agree with each other.
Not much time on the car tonight. Had to make dinner and then had a blazing row with the wife for good measure.
What i did get done was increase the advance stop bush diameter in the MSD distributor to give me about 3 degrees less timing so I can add a bit more initial.
The next thing to do is epoxy shut a couple of air holes on the outer carbs to bring the rpm down a bit. Then I will fire her up and do another recording. With and without the Map sensor pipe connected (to get that base line Eddie
 ) and I will fit the mechanical vacuum gauge while the MAP sensor is not there to see if they agree with each other.
-

dave-r - Grumpy Old Man
- Posts: 9842
- Joined: 12 Oct 2003 21:45
- Location: North of the Tyne, England
-

Eddie - Frequent Poster
- Posts: 6212
- Joined: 16 Oct 2006 21:26
- Location: Terre Haute, Ind.
-

Jon - Frequent Poster
- Posts: 1229
- Joined: 21 Aug 2005 15:12
- Location: Medford Oregon
Didn't get everything I wanted done last night due to a massive water leak from the thermostat housing. 
I removed the thermostat to drill some holes in it but when I removed it I found that I had already done this. I had forgotten.
After re-fitting it and firing up the engine the seal was leaking like mad. So I had to pack in for the night. It was getting late anyhow.
What I DID get done though was check the vacuum level with a mechanical gauge. It turns out the MAP sensor is reading perfectly. I really do have a fraction over 9 inches of vacuum at idle. That is about twice the vacuum I had with the old hydraulic camshaft.
I also blocked off some of the holes I had previously drilled in the carb throttle blades to get the idle right with the old cam. That seems to have worked well too.
In case you are wondering how you fill holes in throttle blades? I take a tiny bit of brazing rod, drill the hole to the same diameter, and counter sink each side slightly.
Then, with the bit of rod in the hole, I crush it in a vice to expand the brass rod and form a rivet. After filing flush I also stake the center of the rivet on each side with a center punch.

I removed the thermostat to drill some holes in it but when I removed it I found that I had already done this. I had forgotten.

After re-fitting it and firing up the engine the seal was leaking like mad. So I had to pack in for the night. It was getting late anyhow.
What I DID get done though was check the vacuum level with a mechanical gauge. It turns out the MAP sensor is reading perfectly. I really do have a fraction over 9 inches of vacuum at idle. That is about twice the vacuum I had with the old hydraulic camshaft.
I also blocked off some of the holes I had previously drilled in the carb throttle blades to get the idle right with the old cam. That seems to have worked well too.
In case you are wondering how you fill holes in throttle blades? I take a tiny bit of brazing rod, drill the hole to the same diameter, and counter sink each side slightly.
Then, with the bit of rod in the hole, I crush it in a vice to expand the brass rod and form a rivet. After filing flush I also stake the center of the rivet on each side with a center punch.
-

dave-r - Grumpy Old Man
- Posts: 9842
- Joined: 12 Oct 2003 21:45
- Location: North of the Tyne, England
Yep. 
First thing will be to replace the 3.5" Holley power valve I think.
You can see how when I let off the throttle and the vacuum driopped suddenly it went very lean. I have to make sure the power valve opens when needed under low vacuum/heavy load situations.

First thing will be to replace the 3.5" Holley power valve I think.
You can see how when I let off the throttle and the vacuum driopped suddenly it went very lean. I have to make sure the power valve opens when needed under low vacuum/heavy load situations.
-

dave-r - Grumpy Old Man
- Posts: 9842
- Joined: 12 Oct 2003 21:45
- Location: North of the Tyne, England
