-
Jimiboy - Frequent Poster
- Posts: 708
- Joined: 22 Dec 2005 10:20
- Location: Sweden
 I've got a set of manual cutoffs I need to install on my Ramcharger
-

Eddie - Frequent Poster
- Posts: 6212
- Joined: 16 Oct 2006 21:26
- Location: Terre Haute, Ind.
-
Jon - Frequent Poster
- Posts: 1229
- Joined: 21 Aug 2005 15:12
- Location: Medford Oregon
![]() by drewcrane » 24 Oct 2008 18:13
by drewcrane » 24 Oct 2008 18:13
those are awesome i want some,i have talked to 2 people that have them ,they both said they had to check the housing assembly because they loosened up,the one guy said this is his 3 rd set the first set just vibrated and shook apart and the gears inside were ruined,so just a tid bit from some one else i still want some there are several new manufactures making them what brand did you use dave?
-
drewcrane - Frequent Poster
- Posts: 2893
- Joined: 01 Sep 2007 12:36
- Location: "follow the laraya belt ,that should get ya there"
![]() by dave-r » 25 Oct 2008 13:04
by dave-r » 25 Oct 2008 13:04
These are Quicktime Performance parts.
I also used their electronic controller which prevents over-torquing of the electric motors and keeps them in sequence. It also means I can have a simple switch which I can flick to an open or closed position without having to hold it down or anything.
I also used their electronic controller which prevents over-torquing of the electric motors and keeps them in sequence. It also means I can have a simple switch which I can flick to an open or closed position without having to hold it down or anything.
-

dave-r - Grumpy Old Man
- Posts: 9842
- Joined: 12 Oct 2003 21:45
- Location: North of the Tyne, England
![]() by drewcrane » 25 Oct 2008 13:40
by drewcrane » 25 Oct 2008 13:40
so you just hit the switch and it opens to the correct point and stop,and the hit it again and it closes and stop,do they come with a switch like that ? cause that is important, i wouldnt want to have to hold the switch the whole time,and then have it open to much and trash the thing,wow ill have to ask my buddie what he has i think he has to hold it down until it is open,humm interesting...........
-
drewcrane - Frequent Poster
- Posts: 2893
- Joined: 01 Sep 2007 12:36
- Location: "follow the laraya belt ,that should get ya there"
![]() by dave-r » 25 Oct 2008 14:39
by dave-r » 25 Oct 2008 14:39
When you buy the cut-outs you get a momentary switch as standard that you have to hold in one direction or the other and you have to just guess when to let go.
With the controller it has a wire that you ground to open the cut-outs. It stops powering the motors as soon as strong resistance is felt (a current rise).
The controller also has buttons on it so you can program it to open only certain amounts. But I have hidden my controller behind the drivers kick panel and just used a toggle switch on the dash to ground the wire.
-
dave-r - Grumpy Old Man
- Posts: 9842
- Joined: 12 Oct 2003 21:45
- Location: North of the Tyne, England
-
drewcrane - Frequent Poster
- Posts: 2893
- Joined: 01 Sep 2007 12:36
- Location: "follow the laraya belt ,that should get ya there"
![]() by dave-r » 03 Mar 2009 14:39
by dave-r » 03 Mar 2009 14:39
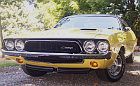
I didn't realise how long it had been since my last update! 
So I had better put this right.
I have been doing bits and bobs to the car over the winter. Mainly finishing the wiring. Fitting the front end lighting and getting all the lights and turn signals working. The halogen headlights are MUCH better now I have fitted relays. Very bright.
For the last few days I have been restoring a used grille that Bob (jh27n0b) very kindly gave me a while ago (18 months?).
This grille was in much better condition than my own which had suffered quite a bit of damage before I owned the car.
The only problem was that this grille was from a non-R/T car and so was painted with the textured argent silver. So I had to remove this completely first before I could paint the grille black. I used a chemical paint stripper after testing on a small area first to make sure it would not effect the bright finish under it.
I did this work soon after the grille arrived from Bob but only now have I started to re-paint it. I will show you the finished results later.
-
 Viewed 497 times")
- Argent paint visible in this shot around the center grille.
-
 Viewed 496 times")
- Paint stripper at work.
-
-
 Viewed 497 times")
 Viewed 496 times")
 Viewed 497 times")
 Viewed 498 times")
-
dave-r - Grumpy Old Man
- Posts: 9842
- Joined: 12 Oct 2003 21:45
- Location: North of the Tyne, England
![]() by Moparman1972 » 03 Mar 2009 14:52
by Moparman1972 » 03 Mar 2009 14:52
The chrome came up very well when I did this on my grille. The stripper removed EVERYTHING, and I couldn't get it to shine much better with mothers than it did right after I stripped it.
Looks good, Dave. You mentioned a relay for the halogens? How is that set up?
Looks good, Dave. You mentioned a relay for the halogens? How is that set up?
- Moparman1972
- Frequent Poster
- Posts: 538
- Joined: 29 Apr 2006 17:10
- Location: Connecticut
![]() by dave-r » 03 Mar 2009 15:02
by dave-r » 03 Mar 2009 15:02
Moparman1972 wrote:Looks good, Dave. You mentioned a relay for the halogens? How is that set up?
You will have to click on this to see it clearly. This gives you full battery voltage (14+ volts) to the lights. With the stock wiring you are lucky if you get more than 11 volts.
 Viewed 512 times")
-
dave-r - Grumpy Old Man
- Posts: 9842
- Joined: 12 Oct 2003 21:45
- Location: North of the Tyne, England

![]() by dave-r » 03 Mar 2009 19:19
by dave-r » 03 Mar 2009 19:19
Those are the wires that normally run to your headlights from the headlight switch.
Normally of all the headlight power comes from the dash wiring, through the switch, to the headlights. With all the electrical connections and contacts there are many losses and the switch can even burn out.
With relays those wires only activate the coil in the relay so there is very little power going through the switch and stock wiring.
All the power for the lights comes straight from the battery instead.
-
dave-r - Grumpy Old Man
- Posts: 9842
- Joined: 12 Oct 2003 21:45
- Location: North of the Tyne, England
![]() by dave-r » 03 Mar 2009 19:26
by dave-r » 03 Mar 2009 19:26
Here is Bobs old grille painted up for my car.
As you know, the center of the stock 1970 R/T grille was not painted but was originally left bare metal. But it is a devil to get like new again and to keep clean. Plus I prefer the look of it when it is painted black. So this is what I have done.
I have also not bothered to try and copy the stock look where there is overspray onto the bright ribbed bit at the back of the grille. I have left a sharp edge between painted and non-painted areas. I like to think I am neater than a Chrysler employee.
 Viewed 497 times")
 Viewed 498 times")
 Viewed 500 times")
Last edited by dave-r on 03 Mar 2009 19:50, edited 1 time in total.
-
dave-r - Grumpy Old Man
- Posts: 9842
- Joined: 12 Oct 2003 21:45
- Location: North of the Tyne, England
 Viewed 497 times")

![]() by Jimiboy » 03 Mar 2009 20:32
by Jimiboy » 03 Mar 2009 20:32
drewcrane wrote:yes that is why mine is mostly black , the factory painters must have been on heroin

-
Jimiboy - Frequent Poster
- Posts: 708
- Joined: 22 Dec 2005 10:20
- Location: Sweden
![]() by Jimiboy » 03 Mar 2009 20:34
by Jimiboy » 03 Mar 2009 20:34
dave-r wrote:Here is how the factory painted them. Bare metal in the grille mesh and overspray onto the bright area.
Really good idea to paint with sharp edges instead... (If you do not care of super resto with the right look of course)
-
Jimiboy - Frequent Poster
- Posts: 708
- Joined: 22 Dec 2005 10:20
- Location: Sweden
 Viewed 500 times")
 It turned out really good after all your work!
 ![]() by drewcrane » 03 Mar 2009 22:36
by drewcrane » 03 Mar 2009 22:36
getting the plastic bumper to fit anywhere near right,hey i gave up on mine and coaxed my brother , who then coaxed another mate and those 2 spent hours upon hours just to get it right cussing and bitching i remember hearing him when i was down stairs withsteam coming out of my ears and they were working on MY car LOL,i have since removed mine and reset it 2 times since then it is very important that that whole front end look correct ,other wise it will look like a sick fish or something like that 
-
drewcrane - Frequent Poster
- Posts: 2893
- Joined: 01 Sep 2007 12:36
- Location: "follow the laraya belt ,that should get ya there"
![]() by Moparman1972 » 03 Mar 2009 23:05
by Moparman1972 » 03 Mar 2009 23:05
dave-r wrote:Those are the wires that normally run to your headlights from the headlight switch.
Normally of all the headlight power comes from the dash wiring, through the switch, to the headlights. With all the electrical connections and contacts there are many losses and the switch can even burn out.
With relays those wires only activate the coil in the relay so there is very little power going through the switch and stock wiring.
All the power for the lights comes straight from the battery instead.
Ah! This makes much more sense to me now! Thanks!
- Moparman1972
- Frequent Poster
- Posts: 538
- Joined: 29 Apr 2006 17:10
- Location: Connecticut
![]() by Jon » 04 Mar 2009 2:20
by Jon » 04 Mar 2009 2:20
I like your finish on the grille Dave. I'd detail the polished surface with some lacquer thinner and call it good.
The relay on the lighting is something I'd like see more of. can you start a new post with "How to do it"? Thanks.
The relay on the lighting is something I'd like see more of. can you start a new post with "How to do it"? Thanks.
-
Jon - Frequent Poster
- Posts: 1229
- Joined: 21 Aug 2005 15:12
- Location: Medford Oregon
![]() by dave-r » 04 Mar 2009 9:26
by dave-r » 04 Mar 2009 9:26
Jon wrote: The relay on the lighting is something I'd like see more of. can you start a new post with "How to do it"? Thanks.
Its easy. But if you can't follow that diagram you maybe unfamiliar with wiring so shouldn't do this without some help.
You just need two relays. One for high and one for low beam.
Cut the exsisting headlight wires next to the battery and fix them to the relays. The two from the switch to each relay coil and the wires to the headlights to the switched connections on the relays. Then run two wires from the battery or alternator output and wire them to the other side of the switched connections. But either fit fuses in these wires or (as I did) fit a pair of 20 or 30 amp circuit breakers that can be re-set.
http://www.madelectrical.com/electrical ... ghts.shtml
-
dave-r - Grumpy Old Man
- Posts: 9842
- Joined: 12 Oct 2003 21:45
- Location: North of the Tyne, England