-

dave-r - Grumpy Old Man
- Posts: 9842
- Joined: 12 Oct 2003 21:45
- Location: North of the Tyne, England
Well things are not progressing very quickly. 
I am having to save a bit of money each month before buying something I need. Also I am finding more problems and more bits that need work as I go.
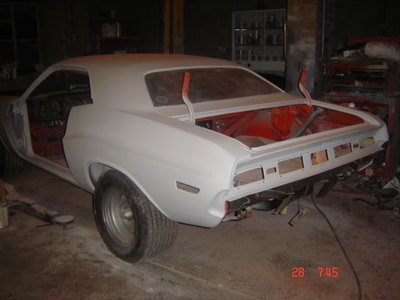
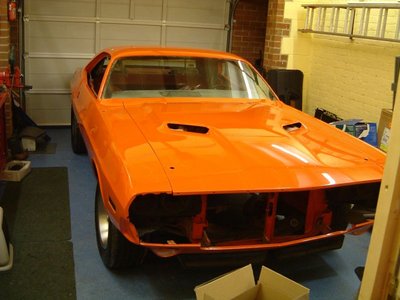
One minor problem was some contamination that caused a few "holes" or "fish eyes" in the top of one fender. It was not a huge problem but I think i might get that one fender re-painted otherwise it will annoy me every time I see it.
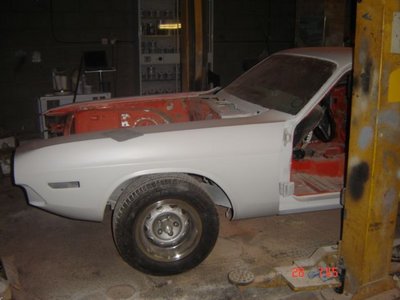
Then I found my painter had not actually removed the front fenders when doing the bodywork. I could have sworn I asked him to and I could have sworn he said he would?
But anyway. Communication breakdown. It means I am now doing bodywork to the tops of the inner fenders and the outer portions of the bulkhead.
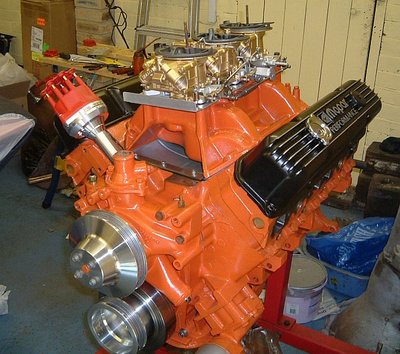
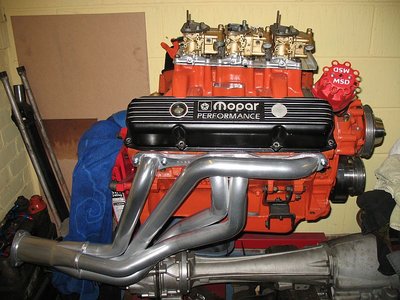
The engine is still not together yet either.
First of all I broke a piston ring.
Then I just found one of my new lifters is damaged.
It will all come good in the end. But the end keeps getting further away.

I am having to save a bit of money each month before buying something I need. Also I am finding more problems and more bits that need work as I go.
One minor problem was some contamination that caused a few "holes" or "fish eyes" in the top of one fender. It was not a huge problem but I think i might get that one fender re-painted otherwise it will annoy me every time I see it.
Then I found my painter had not actually removed the front fenders when doing the bodywork. I could have sworn I asked him to and I could have sworn he said he would?
But anyway. Communication breakdown. It means I am now doing bodywork to the tops of the inner fenders and the outer portions of the bulkhead.
The engine is still not together yet either.
First of all I broke a piston ring.

Then I just found one of my new lifters is damaged.
It will all come good in the end. But the end keeps getting further away.

-

dave-r - Grumpy Old Man
- Posts: 9842
- Joined: 12 Oct 2003 21:45
- Location: North of the Tyne, England
Dave, I take it that you are using standard-weight connecting rods rather than the heavier MOPAR Six-pack ones since your balancer is symetrical. Am I correct? Nice to see so much progress - I'm hoping for your speedy return to the strip!
-
JackT - Frequent Poster
- Posts: 390
- Joined: 18 Oct 2003 2:29
- Location: West Hills, California, USA
Actually Jack I am using the six pack rods because that is what was in the engine originally. In fact they are the only major part of the engine still original.
However I did have it internally ballanced which means adding weight to the crank throws.
However I did have it internally ballanced which means adding weight to the crank throws.
-

dave-r - Grumpy Old Man
- Posts: 9842
- Joined: 12 Oct 2003 21:45
- Location: North of the Tyne, England
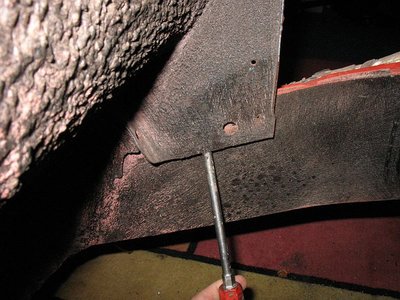
Had to do a bit of welding on the inner fender brace and the rear bottom edge of the inner fender to the chassis rail.
It is a funny thing but this area is often not welded by the factory or, as in my case, it is welded on one side of the car and not the other.
It is a funny thing but this area is often not welded by the factory or, as in my case, it is welded on one side of the car and not the other.
-

dave-r - Grumpy Old Man
- Posts: 9842
- Joined: 12 Oct 2003 21:45
- Location: North of the Tyne, England
So are you just setting this up for strip use? Do you drive it on the street? I know its fast for sure, does your laws prohibit "loud" exhaust system? Over here in Ind. at least there is a law that states any passenger car can be "taken off the road" if the exhaust is excessive and the arresting officer has all the discretion! Ignorant, huh. What kind of Master you putting on, race single or dual pot, power ect..sorry for all the questions is there a "spec" page? I really like your car and I thought I read where another member ststed you were possibly coming over here for the MoPar Nats? That would be great. Oh I do need to get some stronger eyewear mine eyes are failing me mate, must be old age? 
-

Eddie - Frequent Poster
- Posts: 6212
- Joined: 16 Oct 2006 21:26
- Location: Terre Haute, Ind.
It is built more for going around corners mate. Not drag racing. It would go a few 10ths faster with a different front end set-up.
It goes as fast as I want it to. I just try to make it as good a driver as possible while still being fast. Any faster times that come along as I mess with it are just icing on the cake.
I doubt I will ever make the Nats over there. I can't justify the money unless my wife came too and that is not going to happen!
Last edited by dave-r on 18 Apr 2008 8:58, edited 1 time in total.
-

dave-r - Grumpy Old Man
- Posts: 9842
- Joined: 12 Oct 2003 21:45
- Location: North of the Tyne, England
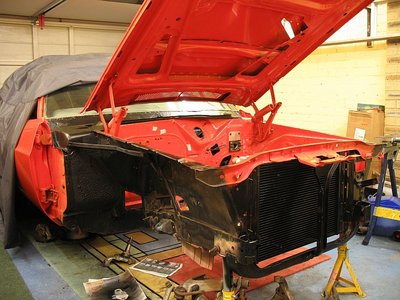
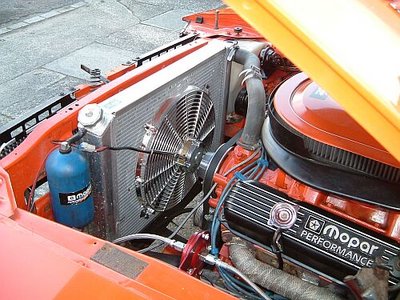
I installed one of these "BeCool" ally radiators a few years ago. It was one of these "bolt-in direct replacement" jobs that cost a fortune. But hey! Being bolt-in saves a lot of hassle right?
Wrong. The damn thing mounted so high the hood would not shut. So I lowered it 2-inches by cutting the brackets welded to the sides.
Now during this rebuild I have dropped the radiator another 1.5-inches because there was a large gap at the bottom of the radiator and the very top of the radiator was behind the radiator frame. And as that is the hottest bit of te radiator i thought it might be better to get it in the airstream.
I still have enough gap at the bottom for oil lines that will go to a combi engine and trans oil cooler mounted out front.
So having done that I thought I may as well paint the front of the thing black so it does not show through the grille.
You can't use normal paint on radiators. You have to use correct automotive radiator paint. This stuff transfers and radiates heat out of the ally.
I have left the engine side plain ally though. Because it looks better that way.
-

dave-r - Grumpy Old Man
- Posts: 9842
- Joined: 12 Oct 2003 21:45
- Location: North of the Tyne, England
airfuelEddie wrote:Dave, is that pic a current one with the Be-cool,( be cool man it fits everything but a MoPar!), radiator in it? If so you did an exemplary job, it looks good!
Took that photo last night.
Here is a photo of the other side of it. Taken a few years ago. You might just see how it is mounted quite high and level with the top of the radiator frame. This is after dropping it 2-inches already.
-

dave-r - Grumpy Old Man
- Posts: 9842
- Joined: 12 Oct 2003 21:45
- Location: North of the Tyne, England
Nice "set-up" Dave. I bet you were pissed that they said bolt-in and it was the opposite.So no fan blade which you really dont need. And nice line lock for the smokeys and heating the rubber. BTW how does it cool compared to the 26" max cooling,(A36).
-

Eddie - Frequent Poster
- Posts: 6212
- Joined: 16 Oct 2006 21:26
- Location: Terre Haute, Ind.
It cools better than the stock 26-inch rad for sure despite the core itself not being as wide. With the "tanks" being at the sides instead of the top and bottom you can't really go any wider.
If you check out the spec on the first page you will see I have a high flow water pump as well. The electric fan has a high airflow (bummer about the high current draw that comes with it) and is controled by a Painless relay and thermostat switch screwed into the water pump housing.
Part of my plan this time around is to reduce the amount of time the fan comes on. To do this I need to get more air to the radiator core when the car is moving.
I have noticed that out of all the bugs stuck to the radiator there were very few in the top third of the core and non at all in the top couple of inches.
This is why i just dropped the radiator a bit more.
The other thing I need to do is drop the front licence plate as it is in the way of air entering the space under the bumper.
After that I intend to install plates to stop air spilling out under and around the radiator and force it to go through the core.
lastly I intend to use more initial timing to see if that lowers the engine temp a bit.
Then with a 180 degree thermostat it should maintain a constant temp with the fan coming on only in slow traffic. Hopefully.
-

dave-r - Grumpy Old Man
- Posts: 9842
- Joined: 12 Oct 2003 21:45
- Location: North of the Tyne, England
-

dave-r - Grumpy Old Man
- Posts: 9842
- Joined: 12 Oct 2003 21:45
- Location: North of the Tyne, England
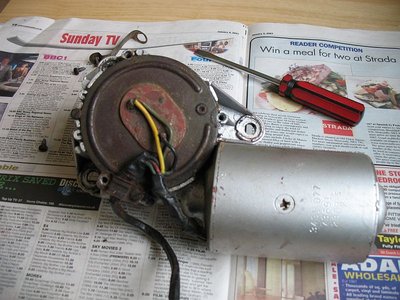
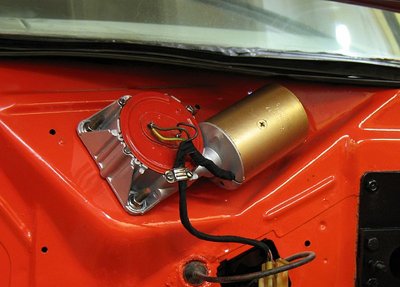
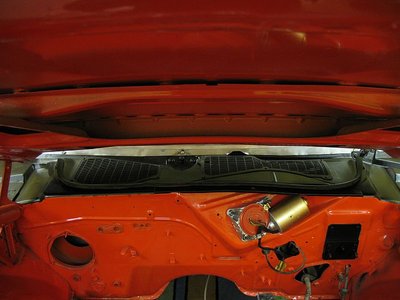
Just did a very quick and very cheap "restoration" on my windscreen wiper motor. 
I just did it on my kitchen table. Including time to let the paint dry it took just under three hours.
Not perfect I know but it looks a bit better than before.
I just did it on my kitchen table. Including time to let the paint dry it took just under three hours.
Not perfect I know but it looks a bit better than before.
-

dave-r - Grumpy Old Man
- Posts: 9842
- Joined: 12 Oct 2003 21:45
- Location: North of the Tyne, England
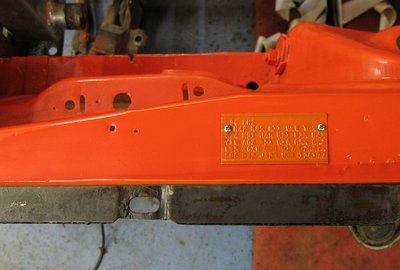
I am not sure if have put my fender tag in the right place or not?
My problem is that there are three holes of equal spacing. I have a feeling the tag was in the first two holes. But it looks better to me in the rear two.
Were they always placed in the exact same position by Chrysler or was it one of these things where different workers put them roughly in the same place but with with some variation??
The rear screw actually goes through the inner fender brace.
-

dave-r - Grumpy Old Man
- Posts: 9842
- Joined: 12 Oct 2003 21:45
- Location: North of the Tyne, England
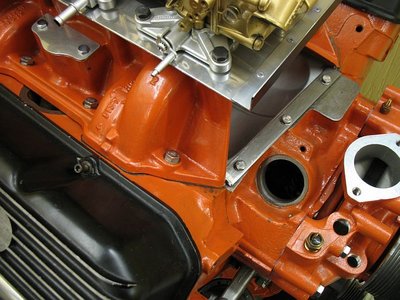
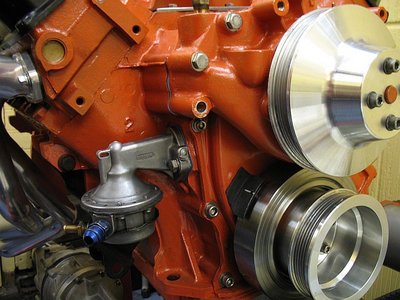
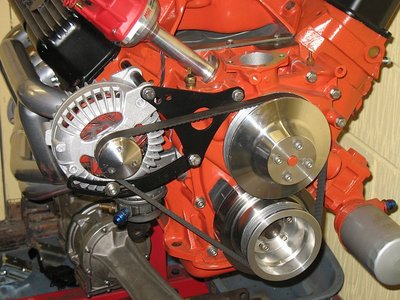
Yes that is an underdrive crank pulley.
I wanted the 1-inch belt but could do without the underdrive bit.
Mopar alternators are very poor at low rpms as it is. Underdriving them makes them worse. At idle I can barely keep above 12 volts even though I have increased idle speed.
But I am working on the problem. Less load on the alternator will help.
-

dave-r - Grumpy Old Man
- Posts: 9842
- Joined: 12 Oct 2003 21:45
- Location: North of the Tyne, England
Dave, nice eh putting back all small things after a paint job. Every single bolt you install makes it looks better and better. Will be a beautifull challenger again when your done and will be a blast to run after all that time and work you've put in! Good to see you've fight an won that weird sickness you had. All fine now?
Anyway, good to see (small) progress every now and then again.
Anyway, good to see (small) progress every now and then again.
- 72 Challenger (Hans)
- Frequent Poster
- Posts: 161
- Joined: 19 Oct 2003 18:09
- Location: Netherlands
Nice to hear from you Hans.
I am not quite OK yet but I feel a lot better. Thanks for asking.
At the moment I am trying to organise some friends to come around and help me put the engine/trans back in the car.
After that I will have the room to paint/fit the front suspension and then start on the interior before re-wiring the whole car.
Then I will feel as if I am getting somewhere.
-

dave-r - Grumpy Old Man
- Posts: 9842
- Joined: 12 Oct 2003 21:45
- Location: North of the Tyne, England
dave-r wrote:At the moment I am trying to organise some friends to come around and help me put the engine/trans back in the car.
Do you mean that you will mount it manually? (not using a lift or something?)
dave-r wrote:After that I will have the room to paint/fit the front suspension and then start on the interior before re-wiring the whole car.
Re-wiring the whole car? It sounds like you won´t be un-empoyed in the near future. Isn´t that very time consuming,or? Have you planned to do any mods compared to the original wiring?
- christer
- Ghost 48
- Posts: 2133
- Joined: 13 Oct 2006 19:52
- Location: Sweden
Christer. I am very physically limited at the moment. I am getting better but it will probably be another couple of months before I am even fit for work let alone manhandling a crane with a 440 engine hanging from it.
I could prodable do it but the effort would have me in bed for a week with blinding headaches.
I did build a simple wooden trolley to carry the engine and transmission under the car but that was before I became ill.
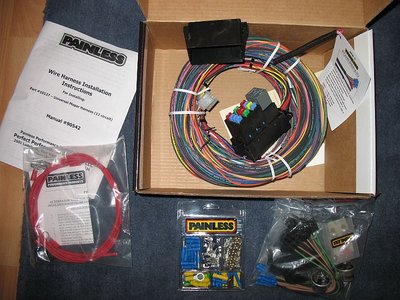
Yes I am going to completely re-wire the car with the Painless kit as the existing wiring is not great in many places. Yes it is going to be modified to reduce the load on the alternator as much as possible and also maintain a high voltage in the wiring harness. Currently the voltage in most of the harness is only 11 volts when under load. In some places it is less than that.
-

dave-r - Grumpy Old Man
- Posts: 9842
- Joined: 12 Oct 2003 21:45
- Location: North of the Tyne, England
-

dave-r - Grumpy Old Man
- Posts: 9842
- Joined: 12 Oct 2003 21:45
- Location: North of the Tyne, England
dave-r wrote:Christer. I am very physically limited at the moment. I am getting better but it will probably be another couple of months before I am even fit for work let alone manhandling a crane with a 440 engine hanging from it.
I could prodable do it but the effort would have me in bed for a week with blinding headaches.
I am sorry to hear that the illness still makes your life a bit difficult. The main thing is that you are getting better all of the time.
dave-r wrote:I did build a simple wooden trolley to carry the engine and transmission under the car but that was before I became ill.
I suppose that you are going to use some kind of winch then.
dave-r wrote:Yes I am going to completely re-wire the car with the Painless kit as the existing wiring is not great in many places. Yes it is going to be modified to reduce the load on the alternator as much as possible and also maintain a high voltage in the wiring harness. Currently the voltage in most of the harness is only 11 volts when under load. In some places it is less than that.
I hope that it will be as painless as the name implies. I think you will make it quite easy considering your electrical skill. I am quite sure that you will let us know about your progress, right? That will be intresting reading.

- christer
- Ghost 48
- Posts: 2133
- Joined: 13 Oct 2006 19:52
- Location: Sweden
Christer. I need a crane to lift the engine off the stand and lower it onto the K-frame on the trolley.
Then I have to bolt the flex plate on, fit the torque converter, and bolt the engine and trans together while at the same time fitting the starter motor behind the exhaust pipes.
Then I have to fit the bumper brackets. I couldn't do that before because the bolts for the brackets were holding the engine to the engine stand!
Once the brackets are in place we can lift the front of the car up with the crane and some chains and slide the engine/trans under. Then lower the car onto the k-frame and bolt in place.
Then a lightweight jack will lift the end of the trans up so we can bolt the trans crossmember into place.
All very simple. But much easier (and safer) if a few friends are helping out.
-

dave-r - Grumpy Old Man
- Posts: 9842
- Joined: 12 Oct 2003 21:45
- Location: North of the Tyne, England
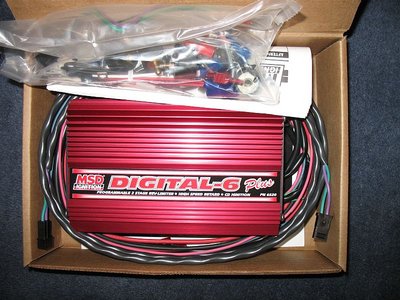
Thats the way the factory did it. It's also the ONLY way in my opinion! That digi6 looks nice Dave. With only 11 volts in the harness, then it's time for a new one. Painless appears to be an easy replacement although I have never used them. They used to only make products for Chevys and Fords, guess the MoPar presence can't be denied.
-

Eddie - Frequent Poster
- Posts: 6212
- Joined: 16 Oct 2006 21:26
- Location: Terre Haute, Ind.

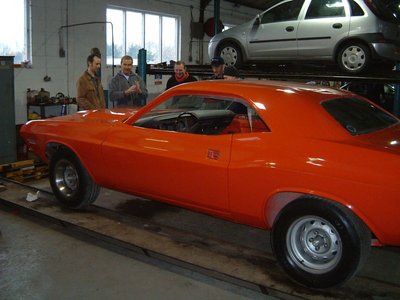

 ( to lower the body on the engine-trans-Kmember-setup). I will try it the next time.