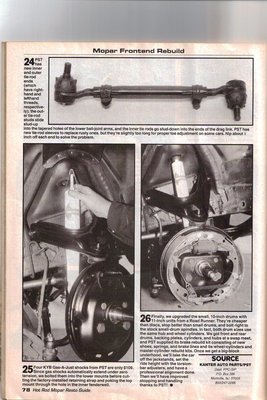
Can anybody give me a good indications as to prep of the underside when replace the old rubber bushings for a new polyeurethane kit.
What problems will or should I encounter?
What do I need to be mindful of?
20 posts
• Page 1 of 1
-

RedRaven - Frequent Poster
- Posts: 1995
- Joined: 15 Jul 2007 20:09
- Location: THE DOG HOUSE
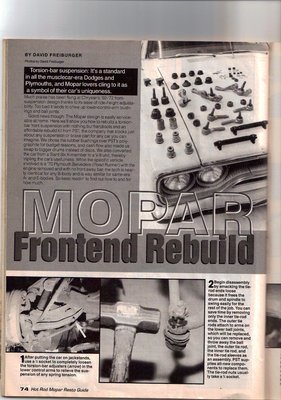
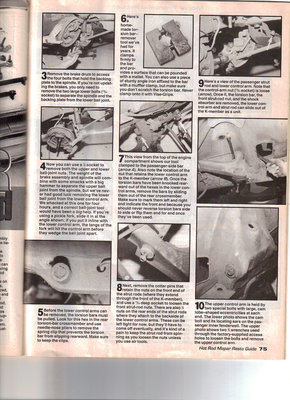
A Big 'Fookin' hammer is nice, A Heavy Duty Air Impact Gun and a powerful compressor,a blowtorch to heat up 'stoobborn' fasteners. Thats how I prep things Wayne!:lol: The right tools like a torsion bar clamp & a long breaker bar with 1/2 inch drive end, upper ball joint driver. To name a few 
 Oh, and I always slice open my hand(s), at whatever I do, it seems like anymore, so heavy gloves might help.

-

Eddie - Frequent Poster
- Posts: 6212
- Joined: 16 Oct 2006 21:26
- Location: Terre Haute, Ind.
dave-r wrote:You mean suspension bushings? Which ones are you doing?
Front or rear? Both?
UCA bushings?
LCA?
K-frame?
To be honest Dave Im not sure, its a bushing kit for a 70 Chally- a company called energy suspension.
I will post some pics of the kit contents.

-

RedRaven - Frequent Poster
- Posts: 1995
- Joined: 15 Jul 2007 20:09
- Location: THE DOG HOUSE
airfuelEddie wrote:A Big 'Fookin' hammer is nice, A Heavy Duty Air Impact Gun and a powerful compressor,a blowtorch to heat up 'stoobborn' fasteners. Thats how I prep things Wayne!:lol: The right tools like a torsion bar clamp & a long breaker bar with 1/2 inch drive end, upper ball joint driver. To name a few
Oh, and I always slice open my hand(s), at whatever I do, it seems like anymore, so heavy gloves might help.
A hammer I can do

A breaker bar 1/2 inch, I picked up a savage one at Santa Pod, Dave reckoned it was a good deal and a nice piece of kit

What does a torsion bar clamp actually do, apart from clamp
Ditto for a ball joint driver.
-

RedRaven - Frequent Poster
- Posts: 1995
- Joined: 15 Jul 2007 20:09
- Location: THE DOG HOUSE
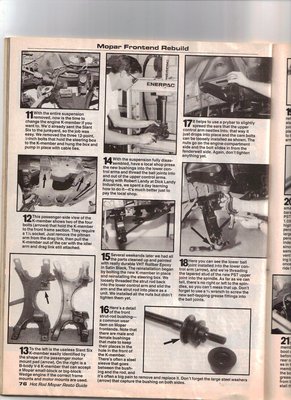
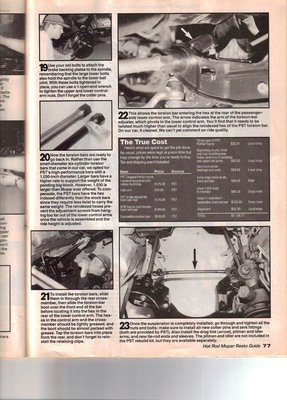
It allows you to remove the torsion bar whithout 'hurting' it. Clamping down on the surface of the bar with a pair of vise grips or any tool that leaves marks or gouges on the steel is a No No. The clamp allows you to hammer on the clamp instead of the torsion bar. The ball joint is screwed into the upper A-Arm. It can be a bitch to remove. The ball joint socket allows you to 'grab' the joints hex flats and you can remove it with the special socket and the Air Gun.
-

Eddie - Frequent Poster
- Posts: 6212
- Joined: 16 Oct 2006 21:26
- Location: Terre Haute, Ind.
airfuelEddie wrote:It allows you to remove the torsion bar whithout 'hurting' it. Clamping down on the surface of the bar with a pair of vise grips or any tool that leaves marks or gouges on the steel is a No No. The clamp allows you to hammer on the clamp instead of the torsion bar. The ball joint is screwed into the upper A-Arm. It can be a bitch to remove. The ball joint socket allows you to 'grab' the joints hex flats and you can remove it with the special socket and the Air Gun.
Some photos would be cool!!


-

RedRaven - Frequent Poster
- Posts: 1995
- Joined: 15 Jul 2007 20:09
- Location: THE DOG HOUSE
Me ,,photos,,surely you jestRedRaven wrote:airfuelEddie wrote:It allows you to remove the torsion bar whithout 'hurting' it. Clamping down on the surface of the bar with a pair of vise grips or any tool that leaves marks or gouges on the steel is a No No. The clamp allows you to hammer on the clamp instead of the torsion bar. The ball joint is screwed into the upper A-Arm. It can be a bitch to remove. The ball joint socket allows you to 'grab' the joints hex flats and you can remove it with the special socket and the Air Gun.
Some photos would be cool!!
-

Eddie - Frequent Poster
- Posts: 6212
- Joined: 16 Oct 2006 21:26
- Location: Terre Haute, Ind.
The article is price wise,,10 yrs. ago so it might have increased in price somewhat. I like to use www.justsuspension.com and www.firmfeel.com NO cheap inferior parts, only OEM quality or higher. I have used both suppliers with excellent results. Bill Kanouse at Just Suspension and Dick Ross at Firm Feel.  I just went and greased my R/T's 'joints' with Amsoil Long fiber synthetic Race Grease
 I just went and greased my R/T's 'joints' with Amsoil Long fiber synthetic Race Grease
 -

Eddie - Frequent Poster
- Posts: 6212
- Joined: 16 Oct 2006 21:26
- Location: Terre Haute, Ind.
-

RedRaven - Frequent Poster
- Posts: 1995
- Joined: 15 Jul 2007 20:09
- Location: THE DOG HOUSE
Since you decided to tackle the job, I would suggest do all components at the same time.
As for tools you will defintly need the speciel socket for the upper ball joint. T-bars can be removed with a pry bar between the K frame and Lower Control Arm Unit when you get to that point.
A good hammer and handler help matters in some situatiions but a pickle fork works good too. Timing your proceedures help alot too if you don't have a vice and such.
Dave had an old thread about using spare sockets and ab bolt to remove the upper control arm bushings. That was slick,
Just get started and everyone will join in to help add their tips.
-
Jon - Frequent Poster
- Posts: 1229
- Joined: 21 Aug 2005 15:12
- Location: Medford Oregon
Yes those wire brushes will be ideal. You can also use a "rust converter" when cutting and welding are not practical.
Check out the products at http://www.frost.co.uk/
They have all the products you need for this sort of work.
Check out the products at http://www.frost.co.uk/
They have all the products you need for this sort of work.
-

dave-r - Grumpy Old Man
- Posts: 9842
- Joined: 12 Oct 2003 21:45
- Location: North of the Tyne, England
RedRaven wrote:Ok thats great I will post a pic of the kit so you can see whats what.
I recognize some of the bushings and where they should go but not all.
Where should I start?
Get her up on stands and remove the brakes first. What type do you have anyways?
While you're at it, maybe check the fluid hoses and such. Moving old hoses around can cause cracks in the lines.
It does keep going on you know... This repair will possibly show another, that one may also lead to another. It's just the way it goes with a 40 year old car.
The rewarding part is knowing everything is tits.
-

Jon - Frequent Poster
- Posts: 1229
- Joined: 21 Aug 2005 15:12
- Location: Medford Oregon
20 posts
• Page 1 of 1
